
Keyboard hotkeys 8
Keyboard hotkeys
| COMMAND | HOTKEYS | DESCRIPTION |
|---|---|---|
| Menu / Select | Enter | Press to bring up the OSD menu. Select a desired option on the menu |
| Up / Down / Left / Right | ▲▼◀▶ | Cursor buttons. Press to move the cursor up, down, left and right on the menu |
| Exit | Esc | Press to exit the OSD menu |
| Mode selection | F1 ~ F6 | Press to switch a preferred mode F1 Matrix F2 PIP F3 Windows F4 Video wall F5 PAP F6 Quadview |
| Matrix | 1~4, A~D | Press to switch to Matrix mode. The hotkey for Matrix mode consists of 2 keystrokes. For example, to monitor source 2 on display B, you can press 2 and then press B |
| PIP | 1~4 / ALT | To switch between different subordinate displays, press ALT + 1~4. |
| Windows | 1~4 / ALT | Press to display the source on top layer. To turn on / off the source display, press ALT + 1~4. |
| Video wall | 1~4 | Select the desired source |
| PAP | 1~4 | Select the source to playback on the main display |
| Quadview | 1~4 | Select the desired source |
IR remote control 9
RS232 Control 9
Click the upgrade button
IR REMOTE CONTROL
| NO. | ITEM | DESCRIPTION |
|---|---|---|
| 1 | INPUT | Press to select the desired source |
| 2 | OUTPUT | Press to select the desired display |
| 3 | Recall | Recall the customized setting Press to light up the buttons (1~4 and A~D) of unit, and then select the preferred mode to recall |
| 4 | ▲▼◀▶ Cusor buttons | Press to move the cursor up, down, left and right on the menu |
| 5 | Exit | Press to exit the OSD menu |
| 6 | MATRIX PIP WINOWS VIDEO WALL PAP QUADVIEW | Select the desired mode you wish to display |
| 7 | Set | Save a customized setting in up to 8 seperate user defined presets. 1 Select the desired mode by pressing the MATRIX/PIP/WINDOWS/VIDEO WALL/PAP/QUADVIEW button 2 Set your preferred input source (1~4 ) and output display (A~D) 3 Press SET button, then all the buttons of input (1~4) and output (A~D) on the unit will flash. 4 Press your preferred button(1~4 and A~D) to save the setting to memory |
| 8 | Select | Select a desired option on the menu |
RS232 CONTROL
Connect PT-MA-HD44-QV to a PC using an RS232 cable
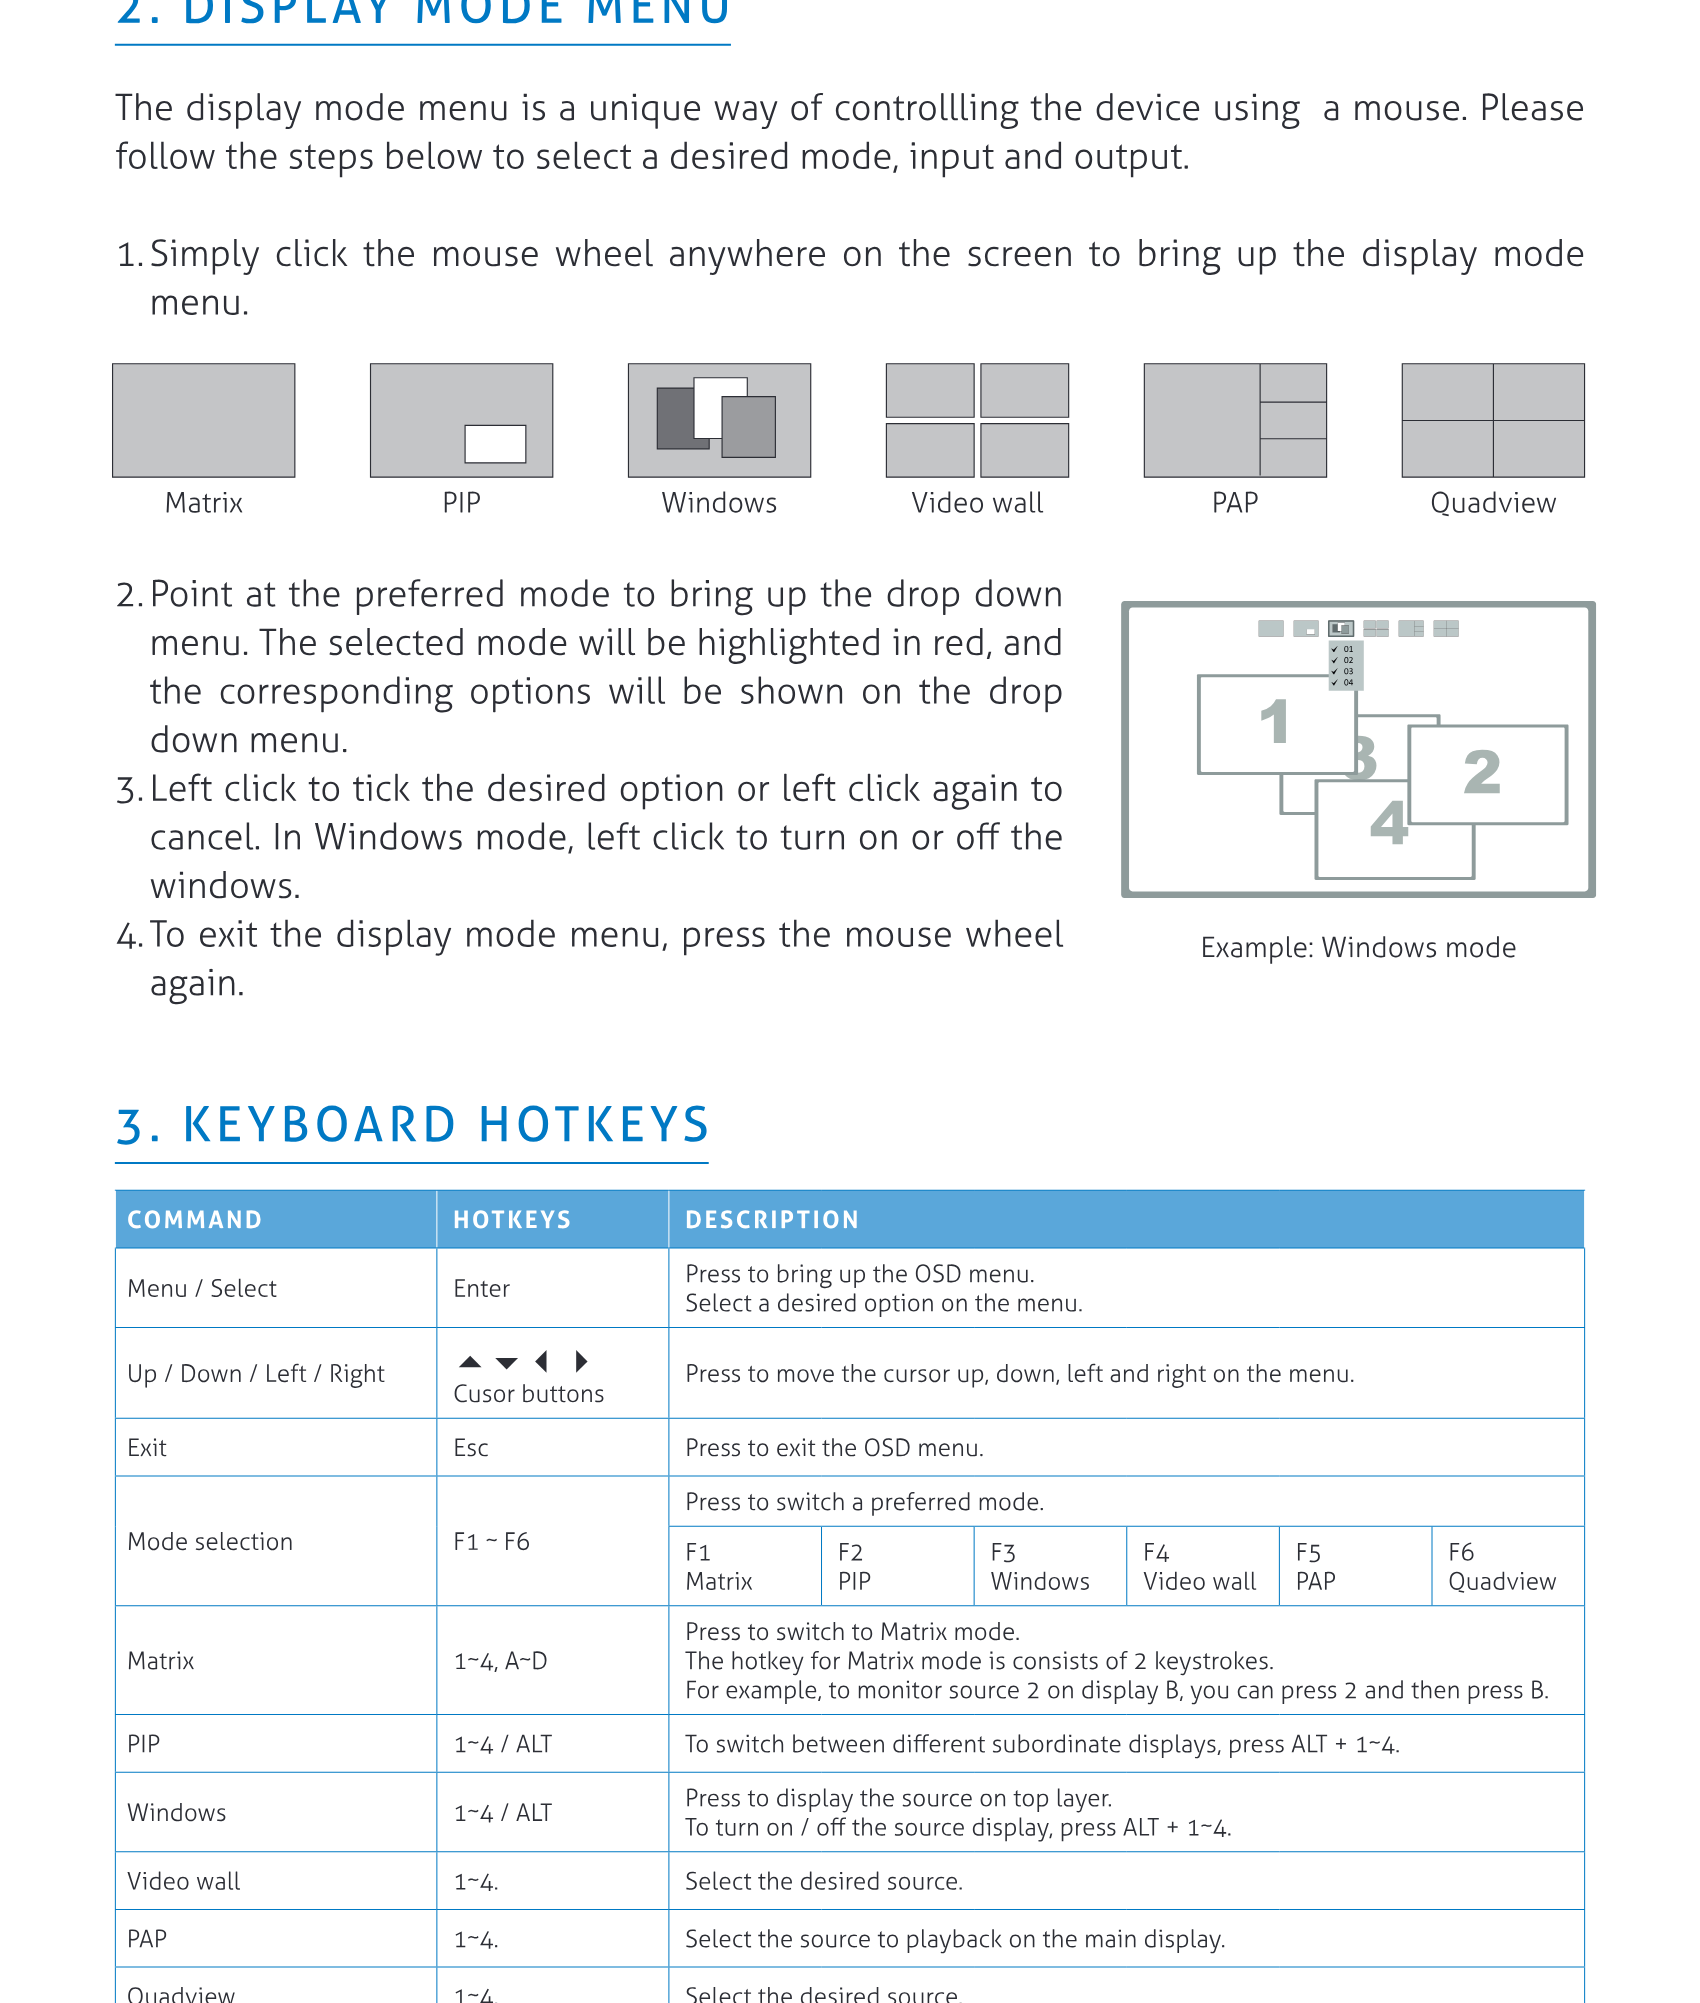
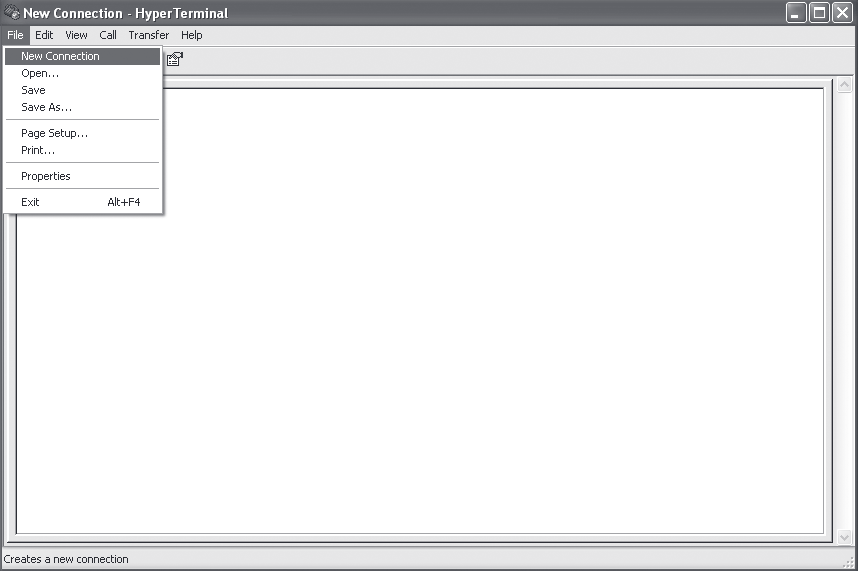
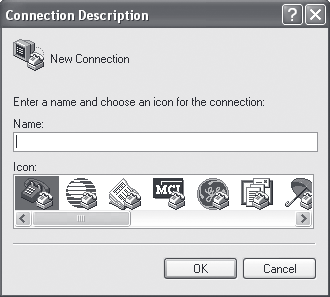
Open Hyper Terminal and create a new connection
Program ▸ Accessories ▸ Communications ▸ Hyper Terminal ▸ New Connection
Enter a preferred name, and then click OK
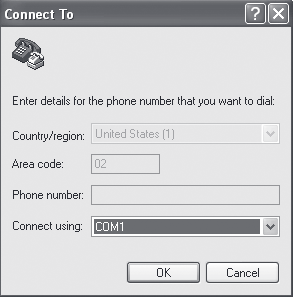
Select Connect using to COM+X
(X is the port which connected to PT-MA-HD44-QV)
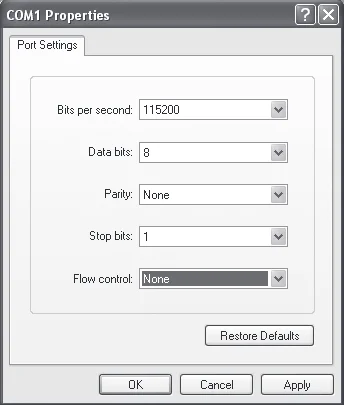
Enter the following data to each option, then press Apply ▸ OK
- Bits per second: 115200
- Date bits: 8
- Parity: None
- Stop bits: 1
- Flow control: None
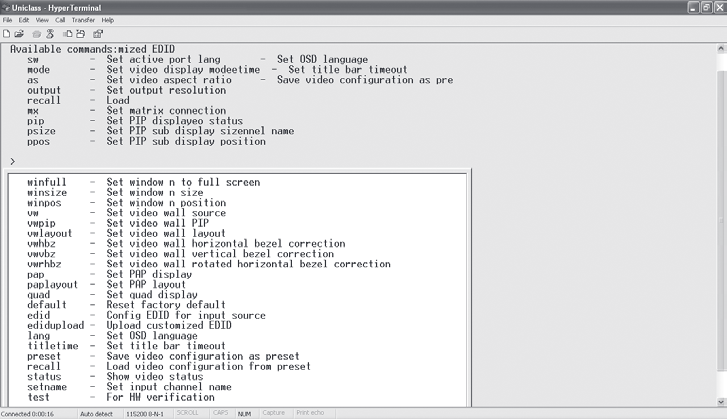
The window of Hyper Terminal will appear after completing the settings
To enter commands, press Enter
For more command details, refer to the list next page or enter help in Hyper Termianl for reference
| COMMAND | DESCRIPTION | PARAMETER |
|---|---|---|
| sw [n] | Switch active port | n: source 1~4 |
| mode [n] | Switch video display mode | n: (1) Matrix (2) PIP (3) Windows (4) Video wall (5) PAP (6) Quad |
| as [n] | Change video aspect ratio | n: (1) Full Screen (2) Keep Ratio |
| output [id] [n] | Set outpurt resolution | id: display A~D n: (1) Auto (2) 1920x1080 (3) 1280x720 |
| pip [n] | Switch to PIP mode | n: source 1~4 |
| mx [id] [n] | Switch to Matrix mode | id: display A~D n: source 1~4 |
| psize [w] [h] | Set size of PIP sub display | w: width of sub display (unit: pixel) h: height of sub display (unit: pixel) |
| ppos [x] [y] | Set position of PIP sub display | x: x-axis of sub display (unit: pixel) y: y-axis of sub display (unit: pixel) |
| win [n] | Move the window “n” in full screen | n: source 1~4 |
| winoff [n] | Disable the window “n” | n: source 1~4 |
| winon [n] | Enable the window “n” | n: source 1~4 |
| winfull [n] | Display the window “n” in full screen | n: source 1~4 |
| winsize [src] [w] [h] | Set the size of window “n” | Src: source 1~4 w: width of window “n” (unit: pixel) h: height of window “n” (unit: pixel) |
| winpos [src] [x] [y] | Set position of window | Src: source 1~4 x: x-axis of window “n” (unit: pixel) y: y-axis of window “n” (unit: pixel) |
| vw [n] | Switch to video wall | n: source 1~4 |
| vwpip [id] [n] | Set pip of video wall | id: display A~D, 0 = restore to video wall n: source 1~4 |
| vwlayout [n] | Set layout of video wall | n: 1~3 n: (1) 2x2 (2) 1x3 rottated left (3) 1x3 rottated right |
| vwhbz [n] | Set horizontal bezel correction of video wall | n: 0~40 |
| vwvbz [n] | Set vertical bezel correction of video wall | n: 0~40 |
| COMMAND | DESCRIPTION | PARAMETER |
|---|---|---|
| vwrhbz [n] | Set rotated horizontal bezel correction of video wall | n: 0~40 |
| pap [n] | Switch to PAP mode | n: source 1~4 |
| paplayout [n] | Set layout of PAP | n: 1~4 n: (1) Right (2) Left (3) Top (4) Bottom |
| quad [n] | Switch to quadview mode | n: source 1~4 |
| default | Restore to the factory default | |
| edid [src] [n] | Config EDID of input source | src: source 1~4 n: 1~8, (1) Auto (2) Monitor A (3) Monitor B (4) Monitor C (5) Monitor D (6) 1920x1080 (7) 1280x720 (8) Custom |
| edidupload | Upload customized EDID | |
| lang [n] | Select language of OSD | n: 1~2 (1) English (2) Chinese |
| titletime [n] | Set timeout of titlebar | n: 1~8 (1) 05 (2) 10 (3) 15 (4) 20 (5) 25 (6) 30 (7) off (8) 00 |
| preset [n] | Config customized settings of video | n: settings 1~4 |
| recall [n] | Load thesettings from preset | n: settings 1~4 |
| satus | Display the status of video | |
| setname [ch] [name] | Set channel name of input | ch: source 1~4 name: 1~16 ascii text |
| test | HW verification |
MODE DESCRIPTIONS
Matrix Mode:
Viewing video sources up to 4 displays
• Press 1~4 to select the video source, press A~D to select the display
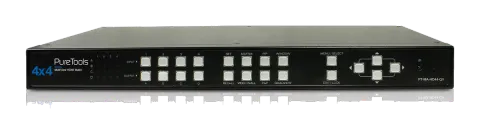
• To distinguish the input source or output display, refer to the LED indicators on the front panel of unit
PIP mode:
Viewing main image with 1 subordinate image in smaller window
• Press 1~4 to select the video source of main image
• Press A~D to select the video source of subordinate image
• Flexible subordinate image zoom control features are available in this mode. The subordinate image can be positioned anywhere using mouse to drag and drop
• To enlarge/reduce the subordinate image, drag the subordinate near a corner using the mouse
• Double click the subordinate image to swap between main and subordinate image
Windows mode:
All video sources can be viewed simultaneously with various window sizes and positions
• Press 1~4 to select the audio source and locate the window to the top
• Press A~D to turn on/off the windows.
• Click the preferred windows to overlap other windows by mouse
• All windows can be positioned anywhere using the mouse to drag and drop. Window sizes can also be changed; drag the preferred window near a corner using the mouse
• Double click the left mouse button to display the desired window in full screen. To exit the full screen display, double click left button of the mouse again. Note that other windows still remain in the same position
Video wall mode:
Viewing the selected video source on multiple displays as one. The images can be configured in 2x2 or 1x3 mode.
• Press 1~4 to select the desired video source
• The Viewing angle will not always be the same when placing the display in either portrait and landscape orientation.
Typically, the viewing angle of portrait orientation has poor visual performance, compared with landscape orientation. Please also take into account the location and lighting characteristics, before assembling the video wall in either mode
PAP mode:
Viewing main image with 3 subordinate images in smaller windows
• Press 1~4 to select the video source of main image
Quadview mode:
Viewing video sources in a display
• Press 1~4 to switch audio channel
Zoom:
- Move the mouse cursor over the window
- Scroll up the mouse scroll wheel to zoom in the video
- Scroll down the mouse scroll wheel to zoom out the video
Drag-and-Drop
- If the crop or zoom-in feature is applied, the video size will be bigger than the window size
- Only a portion of the video is visible
- You can press and hold the right mouse button over the window and then move the mouse to adjust the visible area
- Release the right mouse button to verify the selection
- Repeat the operation to get the desired visible area
Crop:
- Move the mouse cursor over a window
- Click right mouse button - A menu pops up
- Select and click the left button on the aspect ratio you want to crop
- The video will switch to full screen mode
- Click and hold down the left button and then move the mouse to select an area - A red rectangle will appear to help the selection
- Release the left button when the selection is done
- If you want to discard the selected area, click the left button and repeat the previous step to select a new area
- Right click to confirm and exit the selection mode. You should now see the cropped video in the window
Note: When using a computer mouse for control, more features are available:
SETTINGS
- To bring up the settings menu, press the Enter button on the keyboard or MENU/SELECT button on the front panel of the unit or remote control
- Press ▲/▼button to move the cursor, press◀/▶to select the desired option, and then press MENU/SELECT to confirm the selection.
| ITEM | DESCRIPTION |
|---|---|
| System OSD timeout | Setup the timeout of OSD |
| Title bar timeout | Setup the timeout of title bar |
| OSD output | Output OSD to all displays or display A only |
| Shrink control | Select Full screen to fill the entire screen. The screen may be stretched. Select Keep ratio to remain at the original aspect ratios. Black bars may be visible on top-bottom or left-right sides of screen |
| Channel name | Change the name of video source using uppercase, lowercase or digits up to 16 characters |
| Load factory default | Restore to the factory default |
| Firmware date | Display the version of firmware. |
| Video Wall Layout | Select a preferred video wall layout |
| Bezel | Adjust the compensation for bezel between panels |
| PAP Layout | Select a preferred PAP layout |
| Output resolution Output A/B/C/D | Specify a display and set the desired output resolution By default, the resolution of all displays will be set to the best resolution of display A. Resolutions can be set individually for each display only in Matrix mode |
| EDID Configuration | Select a preferred EDID of display for input source |
TECHNICAL SUPPORT
Please contact with your local distributor for more information or technical support
FCC / CE STATEMENTS
FCC Statement:
This equipment has been tested and found to comply with the regulations for a Class B digital device, pursuant to Part 15 of the FCC Rules. These limits are designed to provide reasonable protection against harmful interference when the equipment is operated in a commercial environment. This equipment generates, uses, and can radiate radio frequency energy and, if not installed and used in accordance with this User Guide, may cause harmful interference to radio communications. Operation of this equipment in a residential area is likely to cause harmful interference in which case, the user will be required to correct the interference at his/her own expense
CE Statement:
This is a Class B product in a domestic environment, this product may cause radio interference, in which case the user may be required to take adequate measures
Legal & Compliance
Product identification
Model: PT-MA-HD44-QV – manual version 1.0
Warranty and liability
The manufacturer grants the full statutory warranty on all new devices. As the manufacturer has no influence on installation, the warranty only applies to the product itself. If you detect a fault or damage, please contact your dealer and provide your sales slip or invoice as proof of purchase.
The manufacturer is not liable for damage to persons or property caused by improper installation, operation or maintenance not described in this manual. Do not alter or modify the product or its accessories. Any use other than described in this manual is not permitted and voids warranty and guarantee.
Trademarks and disclaimer
Product model and logo are trademarks. All other company and product names mentioned are trademarks of their respective owners. All rights reserved. No part of this publication may be copied or reproduced without prior written permission. We reserve the right to make changes to the device, packaging or manual and accept no liability for misprints.
FCC
Statement: This equipment has been tested and found to comply with the regulations for a Class B digital device, pursuant to Part 15 of the FCC Rules. These limits are designed to provide reasonable protection against harmful interference when the equipment is operated in a commercial environment. This equipment generates, uses, and can radiate radio frequency energy and, if not installed and used in accordance with this User Guide, may cause harmful interference to radio communications.
Disposal of electrical and electronic equipment
WEEE reg. no.: DE 93847290
The crossed-out wheelie bin symbol on the product, packaging or in this manual means that electrical and electronic equipment must not be disposed of with household waste at the end of its life. Hand in old devices free of charge at a public collection point or return them to a distributor obliged to take them back. Remove batteries and lamps that can be removed without destroying the device before handing it in, and delete any personal data stored on the device. Details are regulated by national law. By returning old devices you help protect the environment.
Batteries
Batteries must not be disposed of with household waste. Return used batteries free of charge to collection points or retailers.
Packaging
Dispose of packaging separately by material (paper/cardboard, plastics) via the local collection systems. Keep packaging material away from children – risk of suffocation. Packaging register LUCID: DE5958616449295.