
Introduction
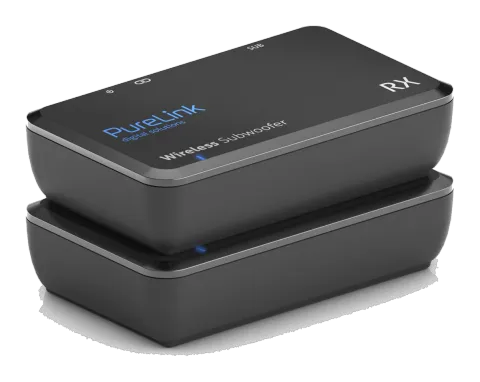
CSW620 is a wireless subwoofer kit designed for wireless subwoofer installation. It works on the 2.4 GHz ISM frequency band with automatic Wifi detection for fast connection and crystal clear audio playback.
Intended Use
This product is intended for indoor use only. Do not use it outdoors. Contact with moisture, e.g. in bathrooms, must be avoided under all circumstances.
For safety and approval purposes (CE), you must not rebuild and/or modify this product. If you use the product for purposes other than those described above, the product may be damaged. In addition, improper use can cause hazards such as short circuiting, fire, electric shock etc.
Read the instructions carefully and keep them. Make this product available to third parties only together with its operating instructions.
This product is only suitable as a headset for connection to a mobile phone or a different sound source. Use the appliance only in accordance with these instructions.
Intended Countries
- Germany
- Austria
- BE BG CZ DK EE IE EL
- ES FR HR IT CY LV LT
- LU HU MT NL PL PT RO
- SI SK FI SE UK
Safety Instructions
Read the operating instructions carefully and especially observe the safety information. If you do not follow the safety instructions and information on proper handling in this manual, we assume no liability for any resulting personal injury or damage to property. Such cases will invalidate the warranty/guarantee.
The device is not a toy. Keep it out of the reach of children and pets.
Do not leave packaging material lying around carelessly. These may become dangerous playing material for children.
Protect the product from extreme temperatures, direct sunlight, strong jolts, high humidity, moisture, flammable gases, vapors and solvents.
Do not place the product under any mechanical stress.
If it is no longer possible to operate the product safely, take it out of operation and protect it from any accidental use. Safe operation can no longer be guaranteed if the product:
- is visibly damaged,
- is no longer working properly,
- has been stored for an extended period in poor ambient conditions or
- has been subjected to any serious transport-related stresses.
Please handle the product carefully. Jolts, impacts or a fall even from a low height can damage the product.
Also observe the safety and operating instructions of any other devices which are connected to the product.
Consult an expert when in doubt about the operation, safety or connection of the device.
Make sure to observe the polarity and magnitude of the output voltage. Incorrect polarity or excessive voltage input leads to the destruction of the connected electrical appliance.
Sufficient ventilation is essential when operating the product. Do not cover the product. Never place the product on a table cloth or on a carpet! Place it on a hard, flame resistant base.
The product should not be used immediately after it has been brought from an area of cold temperature to an area of warm temperature. Condensed water might destroy the product. Wait until the product adapts to the new ambient temperature before use.
Make sure that the output of the power adapter is not short-circuited.
To avoid damages to the sound system by inrush current, please switch the amplifier off before installing the product. Non-compliance may cause damages to power amplifier, sound system and your hearing! The amplifier is to be switched on last, after signal source and the product are already switched on.
Do not attempt to use the product with other power adapters. Despite of matching plugs it may still damage the product, the signal source and the sound system!
Caution: Excessive sound pressure from ear and headphones can cause hearing damage. If you hear loud music for a long time, your hearing can be impaired. Set an appropriate volume.
Caution: Suffocation Risk! Keep packaging materials away from children!
Caution: This product contains radios that emit electromagnetic fields. These electromagnetic fields may interfere with pacemakers, defibrillators, and other medical devices. Keep at least 6 inches (approximately 15 cm) of separation between your pacemaker or defibrillator and this product. If you suspect this product is interfering with your pacemaker or any other medical device, stop using it and consult your physician for information specific to your medical device.
Delivery Content
- 1x 2.4GHz Wireless Subwoofer TX
- 1x 2.4GHz Wireless Subwoofer RX
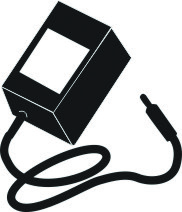
- 2x Power Supply 5V DC, 600mA
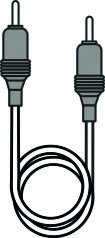
- 2x Subwoofer Cable Length: 70cm
- 1x User Manual
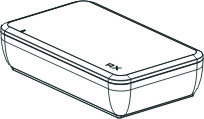
Features
- 2.4GHz ISM Band
- TX and RX already pre-paired
- ID Pairing
- 48KHz Sampling Frequency
- Transmitter Receiver 5V Adaptor x2
- Subwoofer Audio Cable x2
Specifications
| Parameter | TX | RX |
|---|---|---|
| Product Size in mm | 121 x 80 x 30mm | 121 x 80 x 30mm |
| Product Weight in g | 100g | 100g |
| Input | 5V DC, 600mA | 5V DC, 600mA |
| Output | 2Vrms |
| Status Indicator | Description |
|---|---|
| Red LED glows permanently | Standby Mode |
| Blue LED blinks every 2 seconds | Not Paired |
| Blue LED blinks 3 times per second | Pairing Mode |
| Blue LED glows permanently | Is connected and working |
- Frequency Band: 2.4GHz
- Max RF Power: -4.75dBm
- Operating Range: 15m (Line of Sight)
- PSU: 90 - 240V AC @50/60Hz, Cable Length: 1.8m
- Operating Humidity: 10%~90% Rh
- Operating Temperature: 0°C ~ 40°C
- Storage Temperature: -30°C~70°C
Note: This equipment generates, uses, and can radiate radio frequency energy and, if not installed and used in accordance with the instructions, may cause harmful interference to radio communications. However, there is no guarantee that interference will not occur in a particular installation.
If this equipment does cause harmful interference to radio or television reception, which can be determined by turning the equipment off and on, the user is encouraged to try to correct the interference by one or more of the following measures:
- Reorient or relocate the receiving antenna.
- Increase the separation between the equipment and receiver.
- Connect the equipment to an outlet on a circuit different from that to which the receiver is connected.
- Consult the dealer or an experienced radio/TV technician for help.
Important: Changes or modifications to this product not authorized by PureLink could void the electromagnetic compatibility (EMC) and wireless compliance and negate your authority to operate the product.
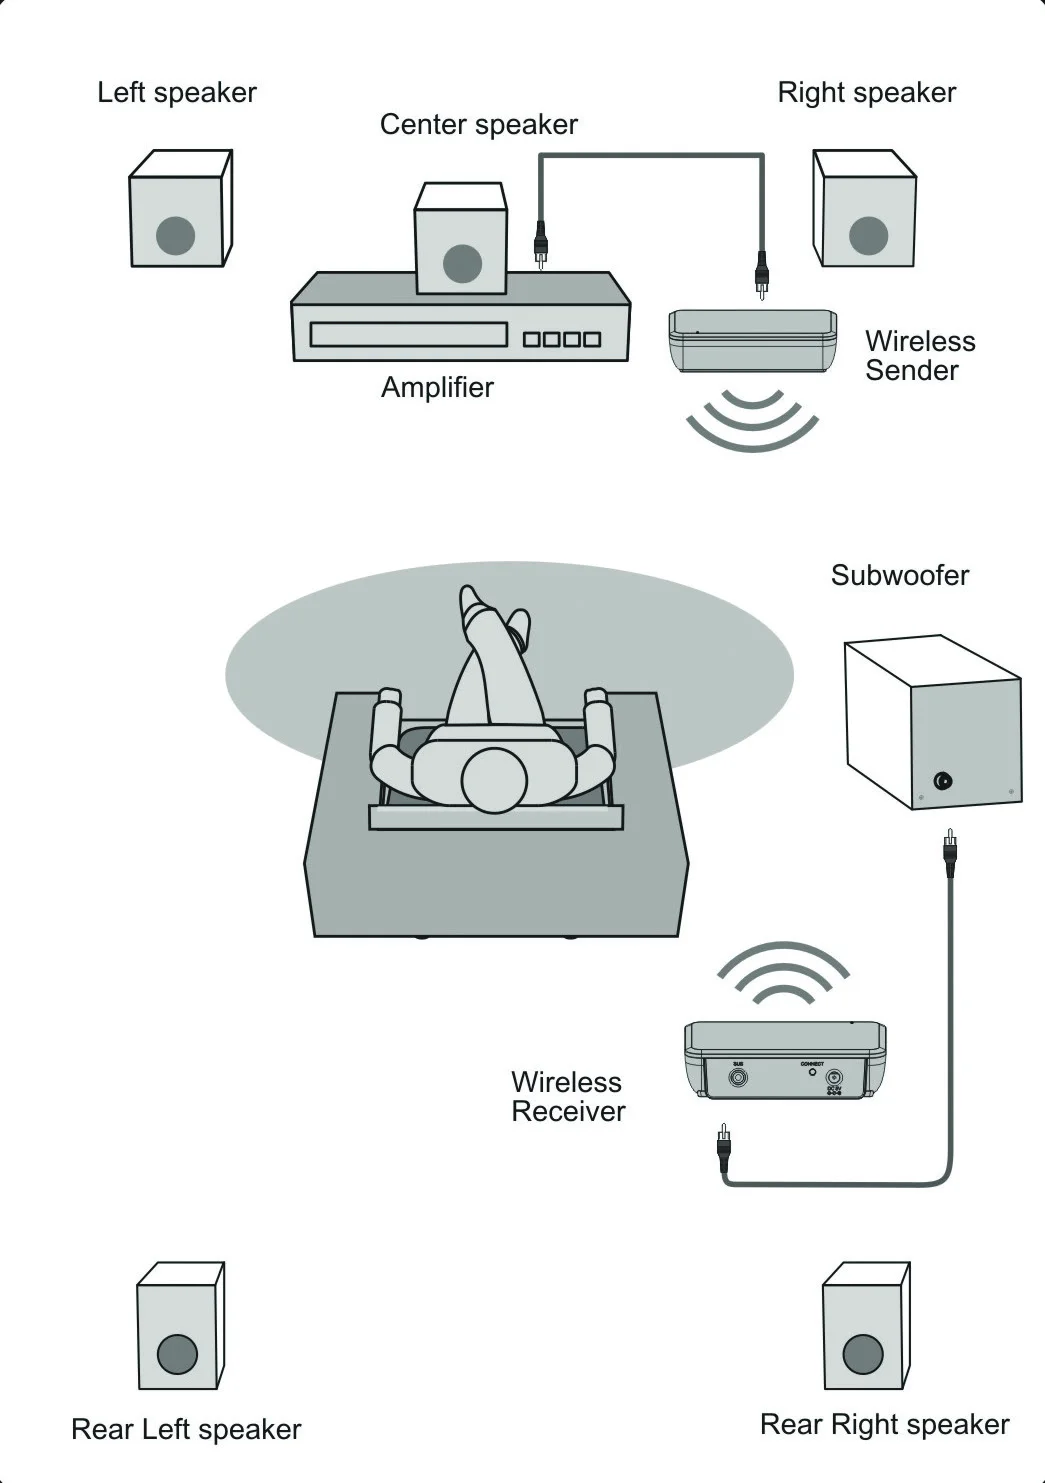
Connection Diagram
Speaker center
Speaker front left
Speaker front right
Subwoofer
Speaker rear right
CSW620 RX
CSW620 TX
Amplifier
Speaker rear left
Interface
TX:
Subwoofer
Input
RCA Left
Input
RCA Right
Input
Pairing Button
Power Supply Input
RX:
Subwoofer
Input
Power Supply Input
Pairing Button
TX-Installation
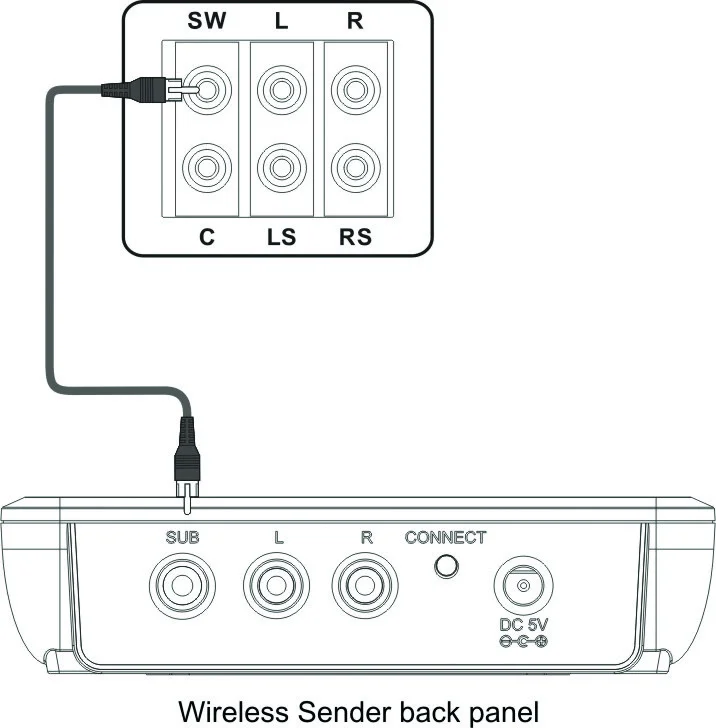
With RCA Subwoofer Cable:
- Take out the CSW620 TX.
- Take a Subwoofer Cable (purple), connect the RCA connector to the SUB socket on the TX unit and the other end to the Subwoofer of your 5.1 audio system.
- Take out the AC/DC Power Supply. Plug the DC end to the DC socket of the CSW620 TX and the AC end to your 90~240V AC outlet.
CSW620 TX - Back panel
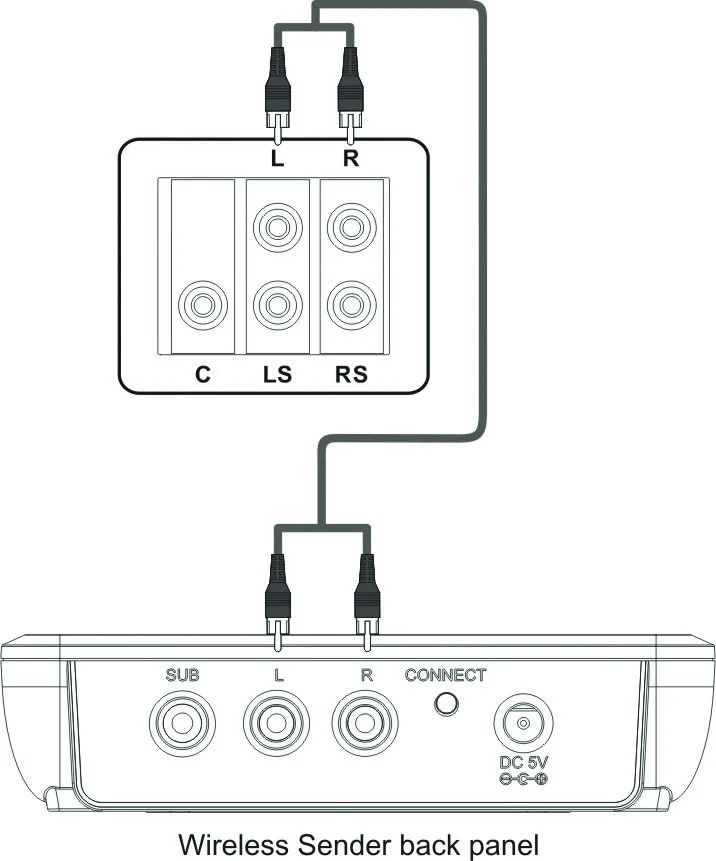
With RCA L/R Cable:
- Take out the CSW620 TX.
- Take an RCA L/R cable (white and red). Please follow the colour code and connect it to the RCA L/R socket of the CSW620 TX and the other end to the RCA L/R socket of your 5.1 audio system.
- Take out the AC/DC Power Supply. Plug the DC end to the DC socket of the CSW620 TX and the AC end to your 90~240V AC outlet.
CSW620 TX - Back panel
RX-Installation
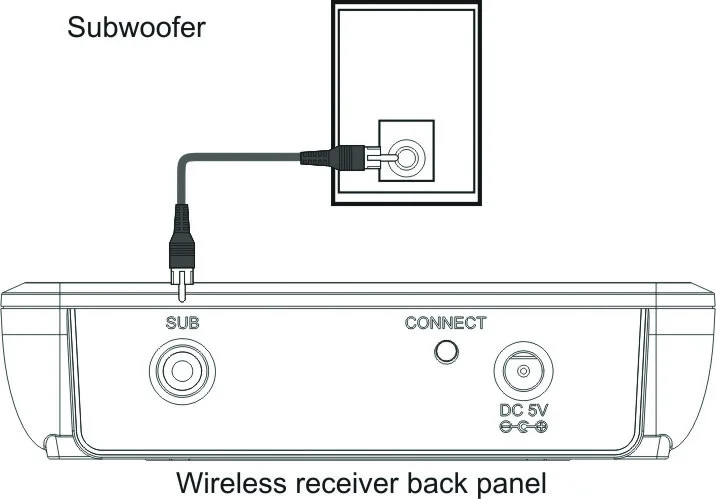
- Take out the CSW620 RX.
- Take a Subwoofer Cable (purple), connect the RCA connector to the SUB socket on the RX unit and the other end to the Subwoofer socket of your amplifier.
- Take out the AC/DC Power Supply. Plug the DC end to the DC socket of the CSW620 RX and the AC end to your 90~240V AC outlet.
When you made the installation as described above then you can use the CSW620 right away because the set is already paired.
If it is not paired then you can pair manually again as described as described in the topic “Pairing”.
Subwoofer
CSW620 RX - Back panel
Pairing
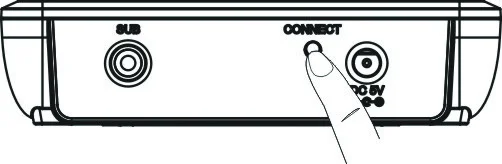
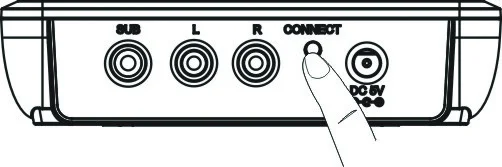
- Press and hold the “connect” button on TX for 2 seconds until the Blue LED starts to blink. (The LED blinks 3 times per second) Now it is in Pairing mode for the next 30 seconds.
- Within 30 seconds, must press and hold the “connect” button on RX for 2 seconds until the Blue LED starts to blink. (The LED blinks 3 times per second)
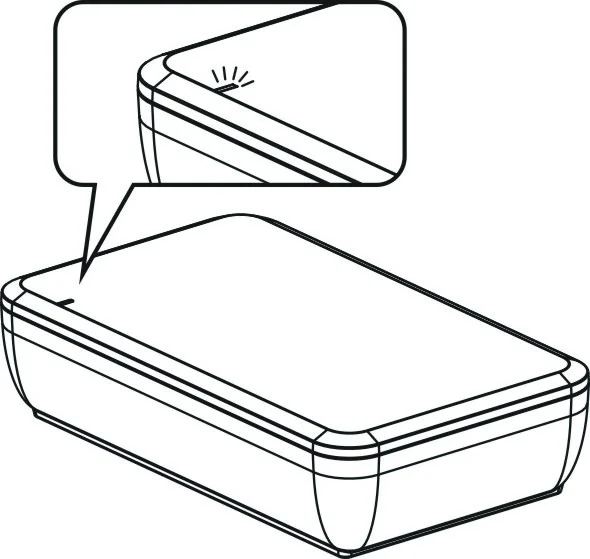
- When the pairing was successful then the LED indicator shows a constant blue light.
Operation
- Turn on your audio amplifier, adjust the volume to suitable level.
- Play the DVD or Blu-ray DVD with 5.1 CH audio.
Note: The CSW620 always prefer to use the signal of the RCA Subwoofer Cable. If there is no signal for 15 Seconds from the RCA Subwoofer Cable then it switches automatically to the RCA L/R Cable Signal.
OPERATION
- Turn on your audio amplifier, adjust the volume to suitable level.
- Play the DVD or Blu-ray DVD with 5.1 CH audio.
- When the pairing was successful then the LED indicator shows a constant blue light.
Note: The CSW620 always prefer to use the signal of the RCA Subwoofer Cable. If there is no signal for 15 Seconds from the RCA Subwoofer Cable then it switches automatically to the RCA L/R Cable Signal.
Troubleshooting
- No audio output signal: Check if the power supply works of TX and RX.
- Check the audio connection on TX and RX.
- Make sure the volume control of RX is in the desired level.
- If the red LED light of the TX is on, then there is no audio signal active.
- Background noise or signal interferences: Check the TX and RX are in the range of specification.
- Check if there are obstacles in the transmission range, such as microwave oven etc.
- Press the pairing key once to check if there is interference again.
Maintenance
There are no components located inside the product you need to maintain. Never open/dismantle the product.
Maintenance, modifications and repairs are to be performed exclusively by an expert or at a qualified shop.
If you have questions which remain unanswered by these operating instructions, contact our technical support service or other technical personnel.
Cleaning
- Before cleaning the product must be disconnected from mains socket and all electrical loads.
- Before cleaning the product it must be disconnected from all other connected products.
- Only use dry and soft cloth to clear the housing of the Product.
- Do not use abrasive or solvents.
- Do not use any aggressive cleaning agents, rubbing alcohol or other chemical solutions as they can cause damage to the housing and malfunctioning.
- To clean the product, a dry, soft and clean cloth is sufficient. Do not apply too much pressure to the housing as this may cause scratch marks.
- You can easily remove dust using a long-haired, soft and clean brush.
Warranty and Liability
The producer grants 2 years warranty to a new device.
As the manufacturer has no influence on installation, warranty only applies to the product itself.
If any fault or damage is detected on your product, please contact your dealer and provide your sales slip or invoice as evidence of the purchase, if necessary. Your dealer will repair the fault either on site, or send the device to the manufacturer. You make the work of our technicians considerably easier, describing possible faults in detail – only then you can be assured that faults, occurring only rarely, will be found and repaired with certainty!
The manufacturer is not liable for damages to persons or property caused by improper installation, operation or maintenance, not described in this manual.
Do not alter or modify the product or its accessories.
Any use other than described in this user`s manual is not permitted and causes loss of warranty, loss of guarantee, and non-liability.
CE Conformity
PureLink GmbH hereby declares that the CSW620 radio communication system complies with Directive 2014/53/EU.
The full text of the EU Declaration of Conformity is available at the following internet address:
www.purelink.de/ce/4251364708989_CE.pdf
Disposal of the Device
WEEE-Reg. No.: DE 93847290
According to the European WEEE directive, any electrical and electronic equipment must not be disposed with consumers waste. As a consumer, you are committed by law to reposit electrical and electronic devices to public collecting points or to the dealer for free at the end of the device’s lifetime. Details are regulated in the respective national legislations. The garbage can symbol on the product, in the manual or on the packaging refers to these terms. With the return of your used devices you actively take part in protecting the environment.
Disclaimer
This product complies with the statutory national and European requirements. All company names and product names are trademarks of their respective owners.
All rights reserved.
We reserve our right for misprints and changes of the device, packing or user manual.
Legal & Compliance
Product identification
Model: CSW620 – manual version 1.0
FCC
This equipment generates, uses, and can radiate radio frequency energy and, if not installed and used in accordance with the instructions, may cause harmful interference to radio communications. If this equipment does cause harmful interference to radio or television reception, which can be determined by turning the equipment off and on, the user is encouraged to try to correct the interference by one or more of the following measures:
Packaging
Dispose of packaging separately by material (paper/cardboard, plastics) via the local collection systems. Keep packaging material away from children – risk of suffocation. Packaging register LUCID: DE5958616449295.