
Box. Fe
Help is only an email away: support@hdanywhere.com.4
Help is only an email away: support@hdanywhere.com.
Glossary of termsContents
Control System
A 3rd party method of control for MHUB systems. For example, Crestron, Control4, RTI, Savant, Fibaro, etc.
HDBaseT
Technology used to convert HDMI in to a format which can be carried over network cable.
IR RX & IR TX
Infrared (IR) Receiver (RX) and Transmitter (TX). The RX ‘receives’ a signal from another remote control and the TX ‘transmits’ it.
MHUB
Video or Audio distribution systems manufactured by HDANYWHERE.
Line Level (Pre-Out)
Volume controllable output.
uControl OS (uOS)
MHUB’s on-board operating system from which most settings can be configured. To access uOS please visit your MHUB’s IP address from a web browser.
Stacking
If one MHUB is connected to another to form a larger system this is referred to as stacking or a stacked system. Only applies to HDANYWHERE hardware.
Tipping Point Compression (TPC)
Video content such as Ultra HD 4K 60 4:4:4 uses up to 18Gbps of data at any one time which is not possible over current HDBaseT technology. HDA makes transmission of 18Gbps content possible using TPC.
uControl
A remote control app for MHUB systems made by HDANYWHERE and available from iOS app stores.
In the box
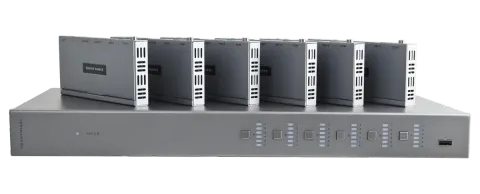
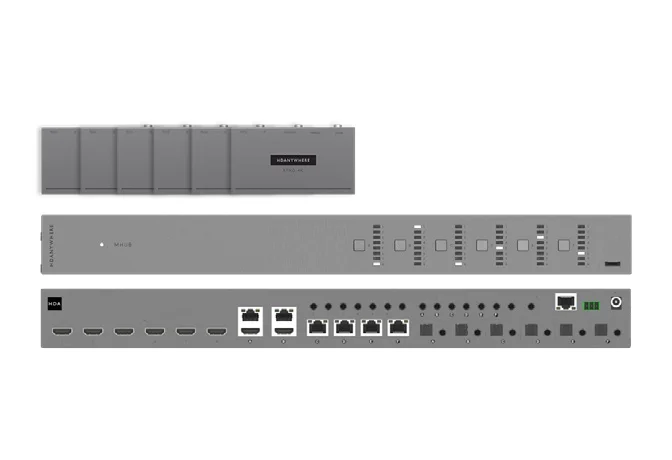
- x1 MHUB (4x4) 100A Chassis/Hub
- x4 Display receivers
- x9 Infrared Transmitter cable (1.5m) (IR TX)
- x5 Infrared (20-60Khz) Receiver cable (1.5m) (IR RX)
- x5 Three Pin Phoenix Connector
- x5 Chassis and display receiver mounting bracket pairs
- x1 Master remote control
- x1 In-room remote control
- x1 RS232 serial cable (1.5m)
- x1 24V 2.7A locking power adapter
- x1 User Guide
- x1 MHUB (6x6) 100A Chassis/Hub
- x6 Display receivers
- x13 Infrared Transmitter cable (1.5m) (IR TX)
- x7 Infrared (20-60Khz) Receiver cable (1.5m) (IR RX)
- x7 Three Pin Phoenix Connector
- x7 Chassis and display receiver mounting bracket pairs
- x1 Master remote control
- x1 In-room remote control
- x1 RS232 serial cable (1.5m)
- x1 24V 3.75A locking power adapter
- x1 User Guide
Name: MHUB (4x4) 100A
Product code: MHUB44100A
Name: MHUB (6x6) 100A
Product code: MHUB66100A
Help is only an email away: support@hdanywhere.com.6
Help is only an email away: support@hdanywhere.com.
Features
Help is only an email away: support@hdanywhere.com.6
IMPORTANT:
- Supports formats up to 4K@60Hz (4:4:4)
- HDR, HDR10, HDR10+, Dolby Vision* and HLG
- 100m range (4K), 150m range (1080p)
- Down scaling on all outputs
- Multi-channel digital audio support up to and including Dolby/Atmos and DTS:X
- HDMI Output Mirrors
- Video source or zone audio extraction modes
- Line-level (Pre-Out) volume control
- Adjustable output gain from -12dBu to +12dBu in 1dB steps
- Bi-directional IR
- Expanded IO capability (API pass through of IR and RS232 data)
- CEC display control with HDMI CEC volume pass through**
- Works with uControlTM Remote
- Remotely manageable
- 2 Year Warranty (+1 with HDA Cloud Registration)
For optimum performance and safety, please read these instructions carefully before connecting, operating or configuring this product. Please keep this manual for future reference.
Note: Surge protection is recommended
This MHUB system contains sensitive electrical components that may be damaged by electrical spikes, surges, electric shock, lightening strikes, etc. The usage of surge protection systems is recommended in order to protect and extend the life of your system.
This product is protected by International Patents:
GB 2548668
US 10587822
HK 1238827
CN 108259784
AU 201711363118 (PENDING)
Fans & noise
MHUB44100A contains cooling fans that generate noise as it ventilates the system. If possible, avoid installing in places where this noise might be unwanted or could be amplified to an unacceptable level (e.g hollow/closed cupboards in living or quiet spaces).
Specification
| Parameter | Value |
|---|---|
| HDMI version | HDMI 2.0b |
| HDCP compliance | HDCP 2.3 & HDCP 1.4 |
| Video bandwidth | 18Gbps |
| Video resolution | Up to 4K@60Hz (4:4:4) with HDR |
| Colour space | RGB, YCbCr 4:4:4, YUV 4:4:4, YCbCr 4:2:2/4:2:0 |
| Colour depth | 8-bit, 10-bit, 12-bit (1080p@60Hz); 8-bit (4K@60Hz); 10-bit, 12-bit (4K@60Hz YCbCr 4:2:2/4:2:0) |
| HDR formats | HDR10, HDR10+, Dolby Vision, HLG* |
| MHUB66100A Video & audio IO | Inputs: x6 HDMI / Outputs: x6 HDBaseT, x2 HDMI (Mirror), x6 Optical, x6 3.5mm Stereo |
| MHUB44100A Video & audio IO | Inputs: x4 HDMI / Outputs: x4 HDBaseT, x1 HDMI (Mirror), x4 Optical, x4 3.5mm Stereo |
| Transmission distance | 1080p (150m / 492ft), 4K 100m / 394ft |
| HDMI audio formats | PCM 2.0 / 5.1 / 7.1, Dolby Digital / Plus / EX, Dolby True HD, DTS, DTS-EX, DTS-96 / 24, DTS High Res, DTS-HD Master Audio, DSD |
| Audio extraction | Optical: PCM 2.0, Dolby Digital, DTS 5.1; 3.5mm Stereo: LPCM 2Ch |
| Stereo audio formats | PCM 2.0 44.1 / 48 / 88.2 / 96 / 176.4 / 192KHz, 16 / 20 / 24bit |
| Output gain (1dB steps) | -12dBu — +12dBu |
| Max output level | -55dB — 0dB |
| Infrared | 20Khz - 60Khz |
| ESD protection | ±8kV (Air-gap discharge), ±4kV (Contact discharge) |
| MHUB66100A Power consumption | 75W (Maximum) |
| MHUB44100A Power consumption | 55.2W (Maximum) |
| MHUB66100A Power supply | 24V 3.75A |
| MHUB44100A Power supply | 24V 2.7A |
| Display receiver | 24V PoC (Power over Cat) |
| Operating temperature | 0°C - 40°C / 32°F - 104°F |
| Storage temperature | -20°C - 60°C / -4°F - 140°F |
| Relative humidity | 20 - 90% (Non-condensing) |
| Housing | Chassis: Steel and Aluminium; Display receiver: Aluminium |
| Colour | Grey (Carbonite) |
| MHUB66100A Dimensions (W/D/H) mm | Chassis: 440 x 226 x 44 |
| MHUB44100A Dimensions (W/D/H) mm | Chassis: 372 x 165 x 36 |
| Display receiver: Dimensions (W/D/H) mm | 140 x 65 x 18 |
| MHUB66100A Weight (g) | Chassis: 3025, Receiver: 126 |
| MHUB44100A Weight (g) | Chassis: 1631, Receiver: 126 |
| Warranty | 2 Year Warranty (+1 with HDA Cloud Registration) |
Note: Only Dolby Vision Low Latency Mode is supported at 60Hz over Video TPC output.
Note: CEC is dependent on display compatibility level. Our implementation is standard but we can not guarantee that the device being integrated is compliant.
MHUB (6x6) 100A front panel
A. Power: Indicator light. If this light is on and solid then MHUB has power and is on.
B. Source Selector: Tapping this button will cycle through HDMI inputs (1-6) sequentially for each corresponding output (A-F).
C. Service Port: Service port for local updates and basic control of MHUB.
MHUB (4x4) 100A front panel
Help is only an email away: support@hdanywhere.com.12
MHUB (6x6) 100A rear panel
- Source (IN)
- Mirror
- Source IR (OUT)
- AVR IR (OUT)
- Display IR (IN)
- All IR (IN)
- Hub IR (IN)
- Control (IP)
- RS232
- DC 24V
- Audio (OUT)
- Video (OUT)
MHUB (4x4) 100A rear panel
- Source (IN)
- Source IR (OUT)
- AVR IR (OUT)
- Audio (OUT)
- Display IR (IN)
- All IR (IN)
- Hub IR (IN)
- Control (IP)
- RS232
- DC 24V
- Video (OUT)
Help is only an email away: support@hdanywhere.com.14
Rear panel descriptions (both models)
- Source (IN): HDMI video input ports indicated by numbers.
- Source IR (OUT): Connect an IR TX to control corresponding HDMI inputs.
- AVR IR (OUT): Connect an IR TX to enable remote (IR) control of an AVR
- Display IR (IN): Connect an IR RX to send a remote (IR) control command through MHUB to the corresponding display receiver’s “IR (OUT)” port.
- All IR (IN): Connect an IR RX to this port to send a remote (IR) control command to all display receiver “IR (OUT)” ports.
- Hub IR (IN): Connect an IR RX to enable remote (IR) control of MHUB.
- Control (IP): Enables TCP/IP control of MHUB over Ethernet.
- RS232: Enables a PC or control system to control MHUB over serial. Wired (A/GND/B).
- Video (OUT): HDBaseT (RJ45) & HDMI video mirror output ports. These ports connect to MHUB display receivers via Category cable. The HDMI “Mirror (OUT)” outputs mirror the HDBaseT port (A & B only) and are not switchable independently. The HDBaseT port has two indicator lights. Left (orange) light: solid means HDCP is detected. Flashing means there is no HDCP. Off means no HDMI signal is detected. Right (green) light: solid means connection between MHUB and display receiver is good. Flashing means that the connection is poor. Off means that there is no connection detected.
- Audio (OUT): Paired 3.5mm stereo and optical audio output ports. These ports support two modes of operation (follow source or follow output/zone) which can be configured from the “System Settings” page on uOS. Once set, the configuration will apply to all Audio (OUT) ports. The 3.5mm ports are pre-out, meaning that volume can be controlled from uOS and fed to an external amplifier. These ports do not downmix.
- Power: Connect the power supply to provide power to MHUB.
MHUB display receiver diagram & description
- Power LED: Indicator light. If this light is on and solid then the display receiver has power.
- Firmware Update: Micro USB port for firmware updates via PC software.
- RS232 (OUT): Will output a serial command sent to MHUB via API or control system command (IP > RS232) only.
- IR IN: Connect an IR RX to send a remote (IR) control command from the display receiver to MHUB’s active “Source IR (OUT)” port. IR OUT: Connect an IR TX to this port to control displays using remote (IR) control commands.
- Audio (OUT): Outputs 2ch stereo (not down-mixed) from video input.
- HDMI (OUT): HDMI video output. Connect to your display to provide a picture and audio.
- Video: HDBaseT link between MHUB and display receiver. This port has two indicator lights. Left light: solid means connection between MHUB and display receiver is good. Flashing means that the connection is poor. Off means that there is no connection detected. Right light: solid means HDCP is detected. Flashing means there is no HDCP. Off means no HDMI signal is detected.
- Power: DC24V / 1A. The display receiver is powered via Power over Cat (PoC) from MHUB and this port is not used.
Help is only an email away: support@hdanywhere.com.16
IR (Infrared) control
MHUB can manage IR signals and route them to sources, AVRs or displays. Using this feature will allow you to use a remote control and pass that IR command from your display location to MHUB or vice-versa.
Sending IR commands from a display ‘back’ to MHUB
This will enable backwards IR control (the most common form of IR control) where IR signals from a remote in any one of your zones is sent back to MHUB and your source device.
Sending IR commands to a display
- Connect an IR TX to port labelled “Source IR (OUT)” on MHUB. Ensure that the port number matches the port number of the corresponding video source input, labelled “Source (IN)”. For example, if you have Apple TV plugged in to port 3, then the IR TX cable should also be connected to Source IR (OUT) port 3.
- Place the IR TX bud (small tear drop part) in front of the IR window of the source. Repeat for each source device you wish to control.
- Connect an IR RX to port labelled “IR IN” on the display receiver.
- Place IR RX head in line-of-sight of the remote control.
1.5m
- Connect an IR TX to port labelled “IR OUT” on the display receiver.
- Place the IR TX bud (small tear drop part) in front of the IR window of the display. Repeat for each display you wish to control.
- Connect an IR RX to port labelled “Display IR (IN)” on MHUB. Ensure that the port letter matches the port letter routed to the display receiver.
- Place IR RX head in line-of-sight of the remote control.
| IR Transmitter (IR TX) | IR Receiver (IR RX) |
|---|---|
| NC | Ground |
| Signal | Signal |
| Power | Power |
Testing that IR control worksUsing the Master & Room remote
This section aims to verify that your MHUB’s IR control system is setup correctly and assumes that your MHUB has been wired as per the instructions laid out in this manual. Please refer to the MHUB wiring diagrams in this document to ensure that your setup matches that before proceeding with the verification below.
Testing basic operation from a display ‘back’ to MHUB
To verify that IR control is working correctly proceed to any display receiver location with an IR RX connected to it. Use the MHUB Room Remote to select a source with an IR TX connected to it at the MHUB end. You should notice that the MHUB switches to that source on your display. Now pick up your source remote control for the source you just switched to and attempt to control the source using the native remote control. If both work then you have setup IR control correctly. Repeat this step for all display receiver locations.
Testing commands from MHUB to a display
To verify that control commands from MHUB to your display are working you will need to use uControl, or test using the following method. 1) select a display that you wish to test 2) connect an IR RX to the corresponding Display IR (IN) input 3) ensure that the display receiver has an IR TX connected and that it is pointed to the display IR receiving window 4) take the display remote control to the MHUB location and point the remote at the IR RX, test the on/off command. The display should turn on or off. This will confirm that IR can pass from MHUB to your display successfully.
Working with identical source devices (discrete IR)
MHUB can work with multiple source devices that are identical due to its discrete IR function. Discrete IR avoids IR clashes that result in unwanted operation of all identical devices. MHUB manages this by targeting IR commands specifically to the source device being watched on the display. When using two or more identical source devices, take measures to avoid IR transmission leaks that could cause the identical source devices to respond in error. This includes simple measures like placing identical sources on different shelves or attempting to ‘hood’ the IR TX so that IR signals can not leak.
MHUB comes with two types of native remote control.
- A Master Remote control
- A Room Remote control
Both remote controls are limited to video switching operations only. HDANYWHERE does not recommend that these remote controls are used as a primary controlling device for MHUB (see section: “MHUB control methods”).
The Master Remote control provides video switching control regardless of the room or zone that the command comes from. This is useful if MHUB is installed in an environment like a bar where you might want to switch all TVs from one source to another.
The Room Remote control uses ‘contextual’ IR which means that it will only switch video sources for the zone or room that you’re in.
Example of MHUB Master and Room remote controls (8x8 model shown)
Help is only an email away: support@hdanywhere.com.18
Currently you can use Cat6, Cat6a, Cat7 or Cat7a with MHUB. Cat5e may work, but is not recommended, due to bandwidth requirements required by the system.
Optimum performance
Whichever network cable type you choose, ensure that the main wiring architecture is ‘solid core’ and not stranded ‘patch’ cabling. Patch cabling can be used for the last few metres of a run (e.g wallplate) but should be avoided over longer runs as signal transfer over stranded cores is significantly impacted. The use of pre-made leads is not recommended unless you can be absolutely sure of their construction credentials (i.e. solid core 568B). For optimum performance, use a single piece of Cat cable terminated directly at the transmitter and the receiver ends. Make sure to use the correct connector types (i.e. RJ45 solid core) crimp connectors.
Shielded cables
Shielded FTP cable is not a stipulation. However, if you are using this type of cable ensure compatible shielded accessories are used. Failure to terminate cable screen at all points can induce interference rather than eliminate it.
Patch panels and wall plates
If patch panels are terminated correctly then there is a minimal loss of distance. The use of wallplates and patch panels has the potential to cause increased resistance on the cable introducing pinch points for signal transmission and could reduce transmission lengths.
Tip: Instead of using RJ45 wallplates search for “brush plates” this will yield many results.
Cabling
HDMI cabling
HDANYWHERE recommends using suitably robust and good quality HDMI cables. It is not advised to use passive HDMI cables over 5 metres in length either on the inputs or the outputs of MHUB or its display receivers. Where HDMI cables longer than 5 metres are required, HDA recommends utilising it own brand of long distance HDMI cables or suitable alternative. A good video demonstrating this can be found here: https://youtu.be/EbWAEndiCuU
Terminate using RJ45 connectors to 568B wiring standard.
Caution: DO NOT USE COPPER CLAD ALUMINIUM/STEEL (CCA/CCS ) Cat CABLE.
Hire a HDA Pro
If cabling infrastructure, control and best practises appear a little too much to absorb and learn then why not hire a HDA Pro to do the work instead for you? Having your MHUB system professionally installed should help to guarantee the system’s long-term performance and ensure that it blends neatly with your decor. All HDA Pros have the added ability to manage your system remotely for you - meaning that routine maintenance and even advanced troubleshooting can be done without the need to visit your home. Ask our HDA Pros for home control, cinema, heating/AC, lighting and security services. Download a guide to picking a HDA Pro here: https://content2.hdanywhere.com/en/downloads/documents/hdanywhere_doc-picking-an-installer.pdf
Find a HDA Pro anywhere in the world today
Visit: https://hdanywhere.com/dealers-and-installers/
MHUB control methods
Help is only an email away: support@hdanywhere.com.20
MHUB control methods
MHUB has been designed to be operated and controlled in numerous ways depending on your requirements. There are limited control options from the front panel and from the Master and Room remote, so attention needs to be paid to the method by which MHUB will be controlled. The methods to control and considerations for each are listed below.
uControl App & uControl Remote
Available for free on iOS the uControl app (and optional remote) is MHUB’s native method of control. All of MHUB’s built-in features are available; offering comprehensive control over switching, source/display/volume control (depending on MHUB model) and executing Sequences in all zones. uControl communicates over the same Local Area Network (LAN) as your MHUB which allows for global control over the entire system regardless of what zone you are in. In the absence of a third-party control system, HDANYWHERE recommends uControl as the method to control your MHUB on a daily basis.
Voice & wearables
All MHUB systems support voice control as standard via an Amazon Echo (Alexa) device or Apple Watch. Voice and wearable control is not designed to act as a primary control method but to assist the other methods listed on this page. Generally, these methods are used to execute Sequences or Functions rather than provide direct control over your AV device or the MHUB itself (for example: navigation, volume and playhead transport control).
Third-party control system
Control via a third-party control system is supported using our latest and most advanced API to date. For an up-to-date list of systems that MHUB supports please visit the “Control Drivers” section of our support site: http://support.hdanywhere.com. Control varies depending on the control system being used but typically, switching is supported with other drivers able to offer more. Please consult a HDA Pro (page 19) to find out more.
uOS
Any device with a web browser can control MHUB directly from uOS’ dashboard. From here it is possible to switch the MHUB and adjust volume (depending on MHUB model).
Master and Room remote controls (IR)
MHUB supports the passing of IR commands from any display receiver location back to MHUB and vice versa, this is described on pages 16-17.
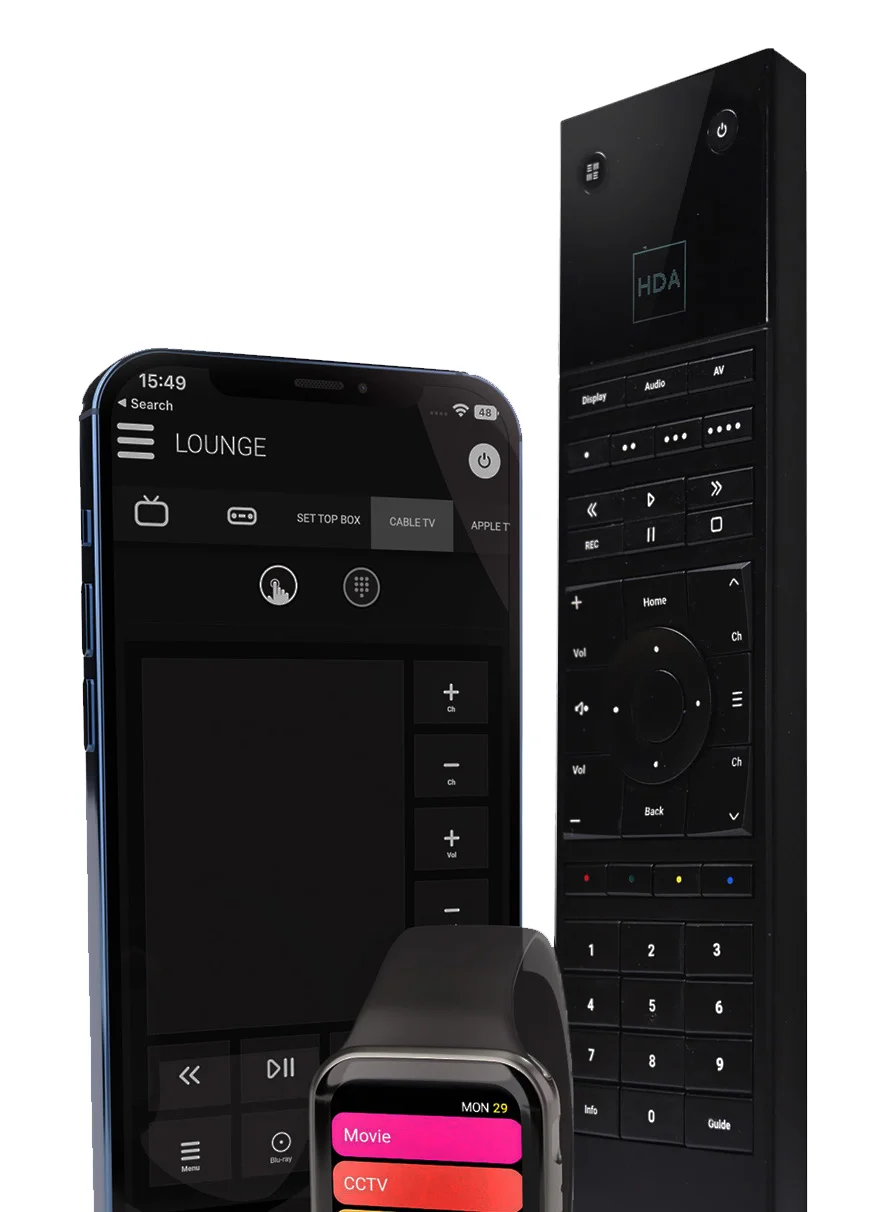
Unified control.
SOLD SEPARATELY
Navigate endless entertainment and scene-setting options, with a unifying remote for all media, music and mood control from devices you already own.
uControl is a smart home platform made by HDANYWHERE. Unintimidating, universal and unifying it is a single, consistent, easy-to-use interface that’s always close to hand.
uControl is free with any MHUB or you can purchase it to control your home with a Zone Processor.
Learn more at https://ucontrol.world
Standalone operation with controlled amplifier audio via amp
1 B
A B C D E F
A B C D
Source (IN)
Mirror
Mirror
Source IR (OUT)
AVR IR (OUT)
Display IR (IN)
4 5 6 3 2 1
4 3 2 1
All IR (IN) Hub IR (IN)
Control (IP) RS232 DC 24V
B A
A B C D E F Audio (OUT) Video (OUT)
E F 5 6
Living Room
VIDEO + AUDIO ZONE
VOLUME CONTROL
VOLUME CONTROL
Bedroom
VIDEO + AUDIO ZONE
Kids room
VIDEO ZONE
MHUB (6X6) 100A
ROUTER OR CONTROL SYSTEM
uControl
AMP
LINE-LEVEL OUTPUT
VOLUME CONTROL
Display Receiver
Display Receiver
Display Receiver
Living Room Display Receiver
Help is only an email away: support@hdanywhere.com.
HDMI Cable
Ethernet Cable
Cat 6 / HDBaseT
IR RX/TX Cable
Speaker Cable
Power
3.5mm stereo
Optical
Stacking with the Multi Zone Matrix Amplifier (MZMA)
1 B
A B C D E F
A B C D
Source (IN)
Mirror
Mirror
Source IR (OUT)
AVR IR (OUT)
Display IR (IN)
4 5 6 3 2 1
4 3 2 1
All IR (IN) Hub IR (IN)
Control (IP) RS232 DC 24V
B A
A B C D E F Audio (OUT) Video (OUT)
E F 5 6
Living Room
VIDEO + AUDIO ZONE
VOLUME CONTROL
VOLUME CONTROL
Bedroom
VIDEO + AUDIO ZONE
Kids room
VIDEO ZONE
MHUB (6X6) 100A
ROUTER OR CONTROL SYSTEM
uControl
Display Receiver
Display Receiver
Display Receiver
Audio (IN)
Mirror (OUT) Control (IP) RS232 Hub IR (IN) Link
1 2 3 4 5 6
A B C D
(- R +) (- L +) (- R +) (- L +) (- R +) (- L +) (- R +) (- L +)
A B C D 2X55W/4Ω
Audio (OUT)
100-240V AC 50/60HZ
PC: MZMA6455
SKU: 1.05.912.002.1
SONOS PORT
MZMA (6x4) 55
FIXED LINE-LEVEL OUTPUT
Using uControl
Help is only an email away: support@hdanywhere.com.28
Using uControl
uControl is our native method of control which can be used to control all sources, AVRs, displays and other MHUB devices from anywhere in your property. The following pages describe the main interface areas, their function and how to use them.
- Tapping this button reveals the zone selector and allows access to the settings menu (see #10-12).
- This label indicates the zone that you are controlling. All control commands are targeted in this area.
- Zone power control: this button reveals a sub menu containing all devices available which can be turned on or off. Power buttons can be displayed in two colours describing how you interact with the button: Red) indicating the device power control can be toggled, a tap to turn on and a tap to turn off. Blue) meaning that the power control requires an explicit interaction to turn on or off. Tap to turn off and press and hold for 2 seconds to turn on.
- Control selector bar. This bar includes all sources that can be controlled in your system. All devices are listed in this bar and navigating between devices can be done by swiping left or right horizontally. Devices can be removed or added back by accessing uControl settings.
- Control group icon: on smaller devices controls are grouped together for quicker access. If your device has its controls grouped then the icons will appear here, examples are numeric keypads, or playhead controls which are typically grouped together.
- Control interface. This area is where your control interface is displayed. The control interface will change dynamically depending on the device that you have selected from the control selector bar.
- Gesture control area will appear in the control interface as a large square or rectangle. This area supports nine control types familiar to all mobile device users. Swipe up, down, left or right to replicate the same command on your device. Tapping acts as an Enter command. Additionally, if supported, then two fingers down will pause and two fingers up will resume. Drawing a chevron to the right will skip forward and a chevron to the left will take you back.
IO. Contr
Don't have time? Watch online!

https://youtu.be/4qGYH4q0XEM
- Audio selector icon. Tapping this icon will cycle through the different audio devices that are available in that zone.
- Display audio (TV & speaker icon): Provides volume/mute control for the display. Pressing and holding the TV icon will reveal ARC options if supported and any audio inputs connected to the MHUB.
- AVR audio (AVR icon): If the zone contains an AVR then volume/mute controls will be presented. When selected, all volume commands will be directed to the AVR instead of the display.
- MZMA AUDIO (Speaker icon): A third tap will enable volume control of speakers in that zone if MHUB has been configured as a V&A/stack with another HDA audio device. An additional label is displayed to inform the user what audio is being routed to the speakers. Pressing and holding this icon will reveal a source selector menu allowing you to switch to audio inputs directly connected to the MZMA, a Sonos Port, for example.
- Volume control: increase or decrease volume by using a slider (MZMA only) or tapping the “+” or “-” buttons. Tapping the mute icon will reduce the volume to 0 or put the device in a mute state. Volume commands are targeted depending on what audio device is active as per point #8.
- Tap to access uControl and OS settings for app and hardware configuration options.
- Change zones by selecting the zone you wish to control here. If a blue display icon appears then this means that there is display control in that zone. Zones can be reordered or removed by pressing and holding on the zone label and then clicking “Done” which appears near location #10.
- Execute Sequence. If you have created a Sequence in MHUB-OS then you can make it visible from uControl’s setting page. Tapping the Sequence button will execute that Sequence anywhere in the property.
Help is only an email away: support@hdanywhere.com.32
Terms & Policies, including General Data Protection Regulation (GDPR) and other Data Protection Laws.
During the setup of MHUB, the HDA Pro (Installer) and End-User are required to agree to a set of terms, conditions, rules, policies and license agreements, including the HDANYWHERE Privacy Policy. These terms, notices and policies are, collectively, the “Agreements”. By installing or using MHUB, you agree to be bound by the Agreements.
EU Conformity
Hereby, HDANYWHERE declares that this HDMI connectivity device is in compliance with the essential requirements and other relevant provisions of the following Directives: 2006/95/EC (LVD Directive); 2004/108/EC (EMC Directive); 1999/5/EC (R&TTE Directive). The full text of the EU declaration of conformity is available in the compliance section at HDANYWHERE.com/legals
Recycling your device properly
In some areas, the disposal of certain electronic devices is regulated. Make sure you dispose of or recycle your device in accordance with your local laws and regulations.
Important information
Playback of advanced audio
HDMI sources must be set to output Dolby Atmos or DTS-HD within their own settings if this audio type is required. Additional EDID configuration may be required on MHUB and this can be done via the hardware OS. Displays, soundbars and AVRs connected to MHUB’s outputs must be capable of decoding and/or playing Dolby Atmos or DTS-HD content in order to hear playback.
HDANYWHERE Limited Product Guarantee
WHO WE ARE
We are HD CONNECTIVITY LTD trading as HDANYWHERE (“HDA”), a limited company registered under number 06046737 in England and Wales with its registered offices at The Haysfield, Malvern, WR14 1GF, United Kingdom.
OUR GUARANTEE TO YOU
We, HDANYWHERE warrant to you, the end user of the HDA hardware (the “Products”) that on the date of delivery of the Products to you, and from that date to the end of the period specified in your user manual or to the end of the period as extended by paragraph 3 if applicable (the “Guarantee Period”), the Products shall:
- match any description that has been provided to you;
- be free from any significant defects in their design, the materials used to make them, and the way they are made;
- be of satisfactory quality (within the meaning of the Consumer Rights Act 2015); and
- be fit for any purpose held out by us.
We offer this guarantee to all our customers who are resident and have an address in Great Britain and Northern Ireland.
EXTENDING YOUR GUARANTEE
On registering your Products with HDA Cloud, the guarantee offered in paragraph 2 by us will automatically extend for a period of one year, provided that your registration takes place within 30 days from the date of delivery. The one year guarantee extension starts automatically from the date that the original guarantee ends.
HOW TO CLAIM ON YOUR GUARANTEE AND YOUR REMEDIES
Subject to paragraphs 5 and 6 of this guarantee, Your sole remedies under Our guarantee to You are as follows:
- Up to 30 days: we will repair or replace your Products or provide you with a full refund of the price of the defective Products at your option.
- Up to 6 Months: we will repair or replace your Products. If we are unable to repair or replace your Products we will provide you with a full refund of the price of the defective Products.
- Up to 3 (4) Years: we will repair or replace your Products. If we are unable to repair or replace your Products we will provide you with a partial refund of the price of the defective Products based upon the devaluation of the Products since the time of purchase.
In order to claim under the guarantee given to you in paragraph 2 you will need to:
- give us notice in writing of your intention to claim under the guarantee during the Guarantee Period, and do so within a reasonable time after finding that some or all of the Products do not comply with the guarantee set out in paragraph 2;
- show that the Products that you claim are defective, have been examined by a HDA Pro or other authorised or suitably qualified installer, and that they have confirmed in writing that the suspected defect in the Products stems solely from a fault in the HDA hardware;
- give us a reasonable opportunity to examine the Products in question;
- provide us with an order number and a dated sales or delivery receipt from an HDA Distributor, HDA Pro or other authorised dealer, reseller or installer of the Products.
- obtain from us in advance of returning the Products a return merchandise authorisation and/or case number ; and
- (if asked to do so by us) return such Products to our place of business at our cost.
CIRCUMSTANCES WHERE YOUR GUARANTEE DOESN’T APPLY
- If you make any further use of the Products after giving us notice of an issue in accordance with paragraph 5;
- the defect arises because you failed to follow our oral or written instructions as to the storage, installation, use and maintenance of the Products;
- the defect arises as a result of your use of the Products with any other software or hardware that is not compatible with the Products;
- the products are used by you for any commercial purpose, including rental or demonstrative purposes;
- you alter or repair the Products without the written consent of HDA;
- the defect arises as a result of an act of god, fair wear and tear, or your misuse, abuse, unreasonable use, wilful damage, negligence, or abnormal storage of the Products or by any other causes unrelated to defective hardware or manufacturing;
- where the serial number has been altered, defaced or removed;
- where the warranty seal on the system has been altered, defaced or removed; or
- where the Products differ from their description as a result of changes made to ensure they comply with applicable statutory or regulatory requirements.
TRANSFERRING YOUR GUARANTEE TO SOMEONE ELSE
[HDA will not accept any liability under such guarantee unless you are the original customer or can produce a letter or chain of letters from the original customer and subsequent customers (where appropriate) transferring the benefit of the guarantee to you.]
PRODUCTS THAT ARE NOT COVERED BY THIS GUARANTEE
This guarantee does not cover products sold and clearly marked “as is”, “B-grade”, or with faults. This guarantee does not apply to any system software that is preinstalled in the HDA hardware, or is subsequently provided via update or upgrade releases. Any and all HDA software is licensed to you under the terms of a separate end user licence agreement found here: https://hdanywhere.com/legal/eula/
HOW THIS GUARANTEE WORKS WITH OUR EULA
We may void this guarantee if we reasonably believe that the HDA system has been used in a manner that violates terms of our separate End User Licence Agreement (EULA) for the HDA software. You assume all-risk and liabilities associated with the use of third party products in conjunction with the Products.
YOUR STATUTORY RIGHTS
This guarantees is in addition to your statutory rights (including under the Consumer Rights Act) which are not affected by this guarantee
GENERAL TERMS OF THIS GUARANTEE
- Except as provided in this guarantee, we shall have no liability to you in respect of the Products’ failure to comply with the guarantee set out in paragraph 2.
- We reserve the right to amend or withdraw this guarantee at any time although for the avoidance of doubt any guarantees that are in existence at such a time will be honoured.
- These Conditions shall apply to any repaired or replacement Product supplied by us.
GUARANTEE CONTACT INFORMATION
To contact (support@hdanywhere.com) or call HDANYWHERE Technical Support (call charges will depend on your telephone provider. Please check with your operator for exact charges).
The team is available 9am - 5pm weekdays.
To help us handle your query promptly, please have your invoice number and model SKU and serial ready.
Let us know what you think. We would love to hear how we could further improve our products and services. If we can make something better, please let us know!
support@hdanywhere.com
Copyright © HDANYWHERE.
HDANYWHERETM is a trading name of HD Connectivity Ltd.
Registered in England & Wales 06046737 VAT 913222367
Note: HDANYWHERE assumes no responsibility for any inaccuracies that may be contained in this document. In no event will HDANYWHERE be liable for direct, indirect, special, incidental, or consequential damages resulting from any defect or omission in this document, even if advised of the possibility of such damages.
Legal & Compliance
Product identification
Models: HDA-250905, HDA-250913 – manual version 1.0
Trademarks and disclaimer
Product model and logo are trademarks. All other company and product names mentioned are trademarks of their respective owners. All rights reserved. No part of this publication may be copied or reproduced without prior written permission. We reserve the right to make changes to the device, packaging or manual and accept no liability for misprints.
WEEE reg. no.: DE 93847290
Batteries
Applies to: HDA-250905
Batteries must not be disposed of with household waste. Return used batteries free of charge to collection points or retailers.
Packaging
Dispose of packaging separately by material (paper/cardboard, plastics) via the local collection systems. Keep packaging material away from children – risk of suffocation. Packaging register LUCID: DE5958616449295.