
Safety precautions
Note: To ensure the best from the product, please read all instructions carefully before using the device. Save this manual for further reference.
- Unpack the equipment carefully and save the original box and packing material for possible future shipment.
- Follow basic safety precautions to reduce the risk of fire, electrical shock and injury to persons.
- Do not dismantle the housing or modify the module. It may result in electrical shock or burn.
- Using supplies or parts not meeting the products’ specifications may cause damage, deterioration or malfunction.
- Refer all servicing to qualified service personnel.
- To prevent fire or shock hazard, do not expose the unit to rain, moisture or install this product near water.
- Do not put any heavy items on the extension cable in case of extrusion.
- Do not remove the housing of the device as opening or removing housing may expose you to dangerous voltage or other hazards.
- Install the device in a place with fine ventilation to avoid damage caused by overheat.
- Keep the module away from liquids.
- Spillage into the housing may result in fire, electrical shock, or equipment damage. If an object or liquid falls or spills on to the housing, unplug the module immediately.
- Do not twist or pull by force ends of the optical cable. It can cause malfunction.
- Do not use liquid or aerosol cleaners to clean this unit. Always unplug the power to the device before cleaning.
- Unplug the power cord when left unused for a long period of time.
- Information on disposal for scrapped devices: do not burn or mix with general household waste, please treat them as normal electrical wastes.
Product Introduction
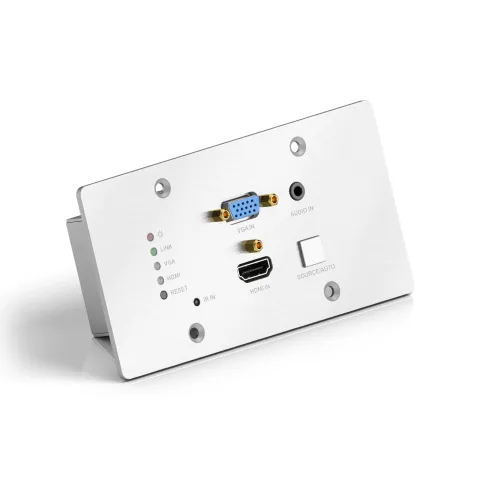
The PT-HDBT-701-TXWP is 2x1 wallplate HDBaseT Transmitter for switching and extending HDMI or VGA + audio input to display or projector, and the transmission distance is up to 40m@4K and 70m@1080p over a single Cat5e/6/7 cable based on Certified HDBaseT technology. The resolution of HDMI input is up to 4K/UHD@ 60Hz 4:2:0 and VGA input up to 1920x1200.
The PT-HDBT-701-TXWP is ideal for huddle rooms, classrooms and small conference rooms. The wall‑mountable design provides the convenience of placing input connections precisely where they are needed.
Feature
- Features one HDMI input and one VGA input with 3.5mm analogue audio input.
- Supports HDMI signal up to 4K@60Hz 4:2:0, VGA input signal up to 1920 x 1200.
- Built-in scaling function to match signals to display native resolution.
- Ensures display of content-protected media and interoperability with other HDCP compliant devices.
- Audio signal can be selectively embedded into the video output.
- HDBaseT technology extend HDMI and VGA, Audio, control signals up to 70m over CATx cable.
- Automatically detect active inputs when sources are connected.
- Flexible control options for compatibility with third-party system, matrix switcher or receiver.
- Supports bi-directional RS232 pass-through with HDBaseT connection and local control.
- PoH (power over HDBaseT) allows powering from the receiver at the display end.
- Provides power supply for devices like Control Panel.
Package List
- 1 x PT-HDBT-701-TXWP 4K Wallplate HDBaseT Transmitter
- 1 x 2-pin Pluggable Terminal Block
- 1 x 4-pin Pluggable Terminal Block
- 1 x User Manual
Note: Please confirm if the product and the accessories are all included, if not, please contact with the dealers.
Front Panel
| No. | Name | Description |
|---|---|---|
| ① | LED indicator | POWER: Glows red when power is applied. LINK: Glows green when an HDBaseT link is established. VGA: Glows green when the VGA input is active, amber when a source is available, and off when there is no source connected. HDMI: Glows when HDMI input is active, amber when a source is available, and does not light when there is no source connected. |
| ② | RESET | This button performs a soft reboot of the PT-HDBT-701-TXWP. |
VGA IN AUDIO IN HDMI IN SOURCE/AUTO LINK VGA HDMI IR RESET # 3 # 65 7 # 4 # 1 # 2
| No. | Name | Description |
|---|---|---|
| ③ | VGA IN | VGA input connector, connect with VGA source. |
| ④ | AUDIO IN | 3.5mm stereo audio connector supplies audio for the VGA input. |
| ⑤ | IR | Built-in IR sensor to receive IR signal from IR remote. |
| ⑥ | HDMI IN | HDMI input connector, connect with HDMI source. |
| ⑦ | SOURCE/AUTO | Backlight Button. • Press this button to switch input signal manually between HDMI and VGA sources. • Press and hold this button 3 seconds, the LED turn green to enter auto-switching mode. Press and hold again can exit this mode. |
Rear Panel
Tx Rx12V 12V RS232IN OUT PoH IN HDBT OUT # 3 4 # 1 # 2
| No. | Name | Description |
|---|---|---|
| ① | HDBT OUT (PoH IN) | HDBaseT output, connects with HDBaseT Receiver over a single Category cable to deliver AV signals, support PoH. |
| ② | IN | 12V input, connects with power adapter. |
| ③ | OUT | 12V output, connects with Control Panel to energize it. |
| ④ | RS232 | Serial port for control PT-HDBT-701-TXWP or the third-party device via RS232 commands. Please refer to the 5. RS232 Control for more details. |
Side Panel
| No. | Name | Description |
|---|---|---|
| ① | FIRMWARE | Micro-USB connector used for firmware update. |
FIRMWARE # 1
Usage Precautions
- Verify all components and accessories included before installation.
- System should be installed in a clean environment, preferably at ambient temperature or within given working temperature range (see page18 for limits).
- All of the power switches, plugs, sockets and power cords should be insulated and safe.
- All devices should be connected before power on.
Overview: Installation
- If installing in a back-box, it is recommended that the PT-HDBT-701-TXWP be installed in a suitable square box. The square box has sufficient space to terminate the cables with jacks behind the unit when fully installed.
- Run one Cat5e/6/7 cable from the PT-HDBT-701-TXWP location to the location
VGA IN AUDIO IN HDMI IN SOURCE/AUTO LINK VGA HDMI IR IN RESET Tx Rx12V 12V RS232IN OUT PoH IN HDBT OUT OUTPUTS 13~16 AUDIO MIC IN AUDIO OUT RL MIX OUT RL OUTPUT 4K Tx Rx R L IR OUT IR IN RS232 AUDIO HDBaseT OUTPUT 4K Tx Rx R L IR OUT IR IN RS232 AUDIO HDBaseT OUTPUT 4K Tx Rx R L IR OUT IR IN RS232 AUDIO HDBaseT OUTPUT 4K Tx Rx R L IR OUT IR IN RS232 AUDIO HDBaseT OUTPUT HDMI AUDIO L R 4K OUTPUT HDMI AUDIO L R 4K OUTPUT HDMI AUDIO L R 4K OUTPUT HDMI AUDIO L R 4K 4K RS232 AUDIO Tx Rx R L INPUT IR OUT IR IN HDBaseT 4K RS232 AUDIO Tx Rx R L INPUT IR OUT IR IN HDBaseT 4K RS232 AUDIO Tx Rx R L INPUT IR OUT IR IN HDBaseT 4K RS232 AUDIO Tx Rx R L INPUT IR OUT IR IN HDBaseT AUDIO MIC IN AUDIO OUT RL MIX OUT RL Tx Rx Receiver Projector Speaker Matrix PT-HDBT-701-TXWP Laptop Blu-ray 1080P 70m 4K 40m HDMI: HDBaseT: RS232: Audio: VGA:
RS232 Connection
There are two RS232 control modes switching via sending 50779% or 50780%.
- Control this PT-HDBT-701-TXWP and far-end third-party device (such as Projector) device by the local PC, and the connection diagram shown as below:
[Diagram not included in extracted text]
- Control the PT-HDBT-701-TXWP by the remote PC which is connected with Receiver. The RS232 control mode can be chosen via RS232 commands, please refer to the 5.3.1 Control Mode Switching for more details.
[Diagram not included in extracted text]
RS232 Control Software
Here take the software docklight as an example.
Installation
Please download the latest Software Version from the link below:
https://docklight.de/download/Docklight.zip
Then follow the installation wizard for installation on Windows 7 and 10.
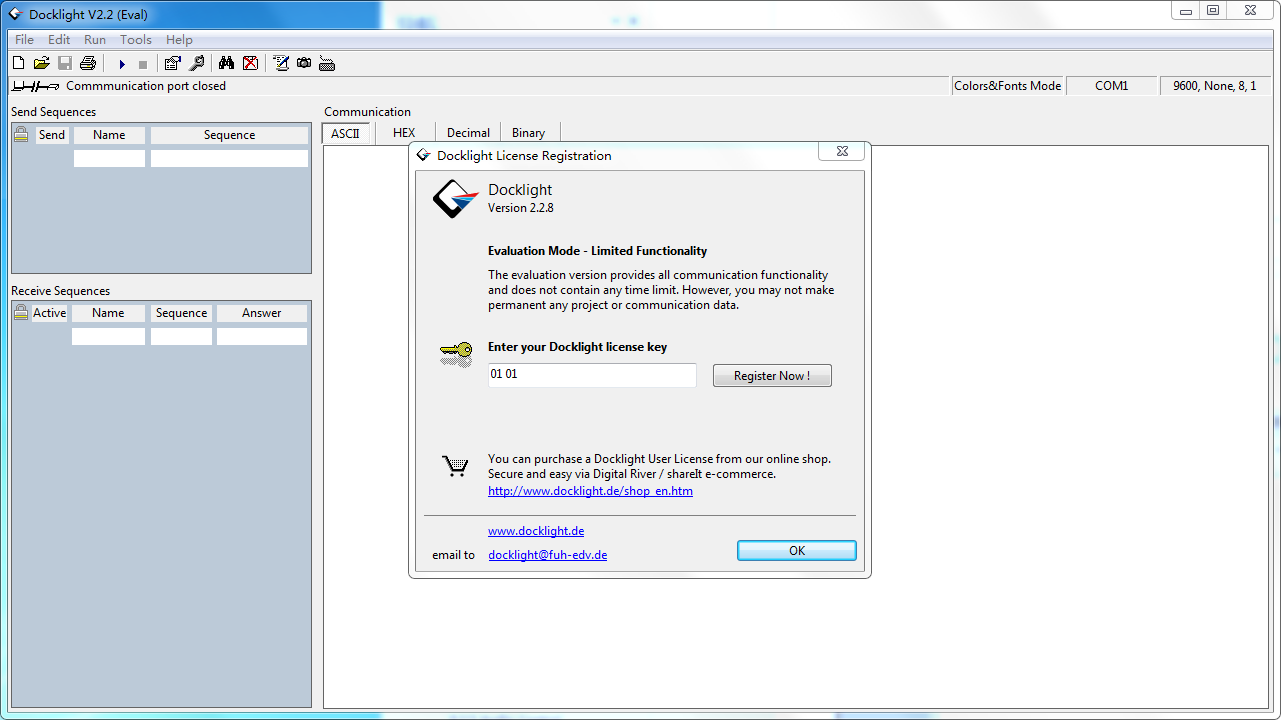
After the installation, Docklight can be run for the first time and should look like the below screen shot:
Registration is not necessary unless you wish to save settings on exit, so unless you wish to register click on "OK" to close the window.
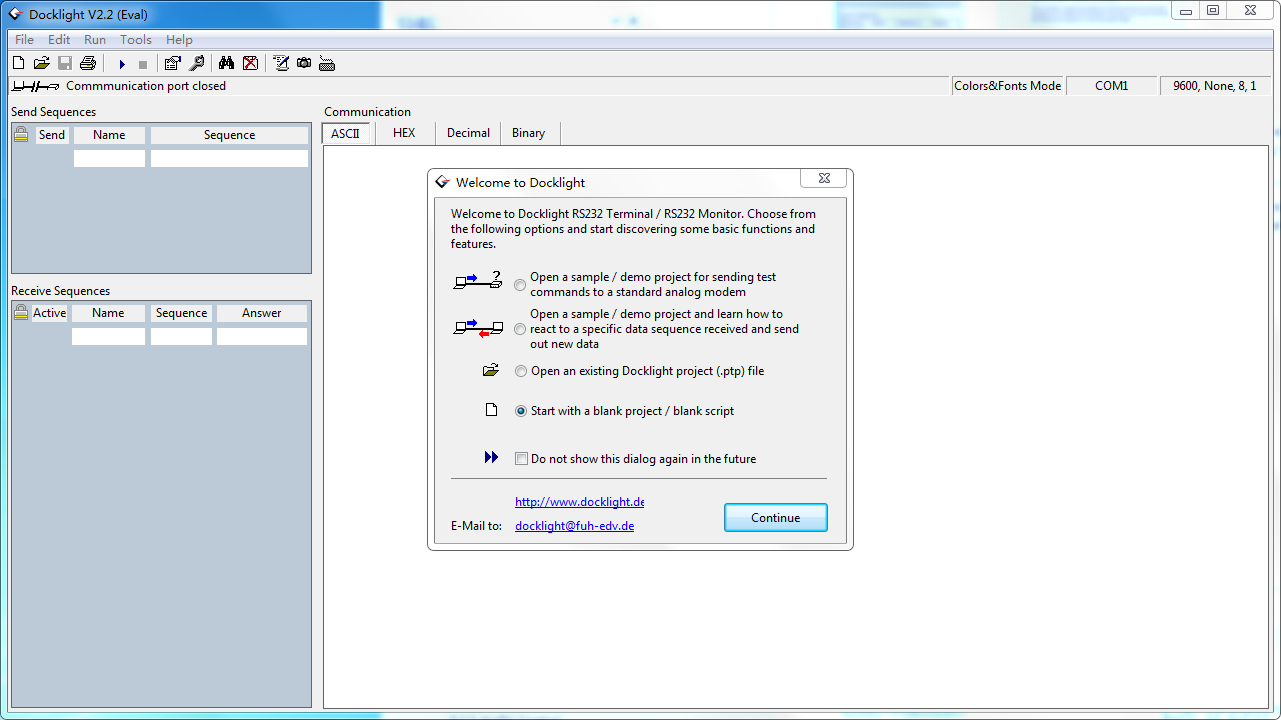
The next pop-up window can also be closed with "Continue". An empty project is enough to send and receive commands easily (The default setting is always “Start with a blank project / blank script “)
Click “OK” to close this window.
Now you are in the main view, where commands are sent and feedback is received.
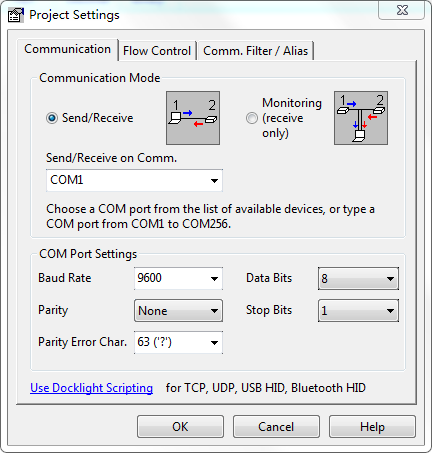
The next step is to select the correct COM port of the PC. To do this, double-click on "COM1" in the corresponding setup window.
Click “Continue” to close this window.
In the following window, select the drop-down menu labeled "Send / Receive on Comm Channel", select the appropriate COM port and then click on "OK" at the bottom right corner.
All other settings can be left at default for most applications, but refer to device RS232 settings to be sure.
Double click on “COM1” to change to the right COM port.
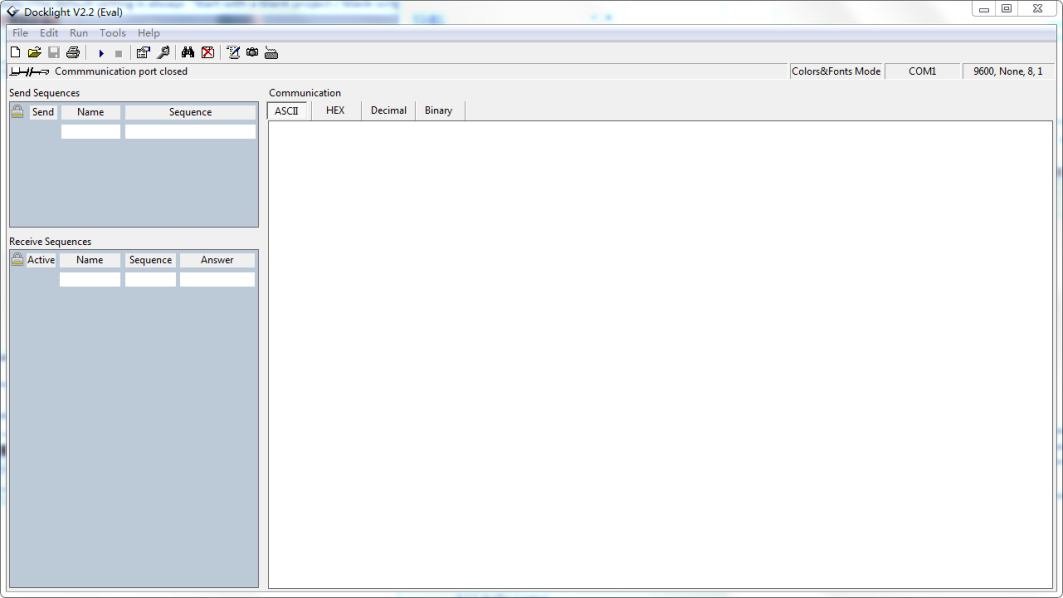
In order to be able to send commands, open communication with the device by clicking on "Play". (1)
Then the keyboard function must be activated, so that commands can be written in the "communication window". (2)
Finally enter the command, for example "50701%". This is then confirmed by pressing "Enter" to send. Any response from the connected device will appear in red. (3)
Select the right COM port.
RS232 Command
Communication protocol: RS232 Communication Protocol
Baud rate: 9600 Data bit: 8 Stop bit: 1 Parity bit: none
Control Mode Switching
| Command | Function | Feedback Example |
|---|---|---|
| 50779% | Switch to RS232 mode 1(Default), control scaler switcher and the far-end third-party device. | RS232 Mode 1: RS232 Control Scaler & Remote. |
| 50780% | Switch to RS232 mode 2, control the scaler switcher from remote. | RS232 Mode 2:RS232 & Remote Control Scaler |
Signal Switching
| Command | Function | Feedback Example |
|---|---|---|
| 50770% | Enable auto-switching | Auto Switching |
| 50771% | Disable auto-switching | Manual Switching |
| 50701% | Switch to HDMI input | Switch to HDMI |
| 50704% | Switch to VGA input | Switch to VGA |
VGA Scaling Configuration
The default output resolution for VGA is 1920x1080. Below is a list of the output resolutions the built-in scaler can output.
| Command | Function | Feedback Example |
|---|---|---|
| 50632% | Check the output resolution | Resolution: xx |
| 50619% | Change the resolution to 1360X768 HD | Resolution: 1360x768 |
| 50626% | Change the resolution to 1024X768 XGA | Resolution: 1024x768 |
| 50627% | Change the resolution to 1280X720 720P | Resolution: 1280x720 |
| 50628% | Change the resolution to 1280X800 WXGA | Resolution: 1280x800 |
| 50629% | Change the resolution to 1920X1080 1080P | Resolution: 1920x1080 |
| 50620% | Change the resolution to1920X1200 WUXGA | Resolution: 1920x1200 |
| 50621% | Change the resolution to1600X1200 UXGA | Resolution: 1600x1200 |
HDCP Compliance
| Command | Function | Feedback Example |
|---|---|---|
| 50790% | Set the HDCP status of HDMI output socket to Active | HDCP Active |
| 50793% | Check HDCP status | HDCP Off/ HDCP On/ HDCP Active (default) |
VGA Image Adjustment
| Command | Function | Feedback Example |
|---|---|---|
| 50636% | Check the brightness | Brightness: xx (xx=00~99) |
| 502xx% | Set the brightness to xx. | Brightness: xx (xx=00~99) |
| 50637% | Check the contrast | Contrast: xx (xx=00~99) |
| 503xx% | Set the contrast to xx. | Contrast: xx (xx=00~99) |
| 50638% | Check the saturation | Saturation: xx (xx=00~99) |
| 504xx% | Set the saturation to xx. | Saturation: xx (xx=00~99) |
| 50639% | Check sharpness | Sharpness: xx (xx=00~99) |
| 505xx% | Set the sharpness to xx. | Sharpness: xx (xx=00~99) |
| 50606% | Auto-adjust the input parameter | VGA Input Auto |
| 50640% | Check the color temperature | Color Temperature: xx (xx can be medium, warm, user, or cool.) |
| 50607% | Adjust the color temperature | Color Temperature: xx (xx can be medium, warm, user, or cool.) |
| 50635% | Check the image aspect ratio | Aspect Ratio: xx (xx can be 16:9, 4:3, or auto.) |
| 50608% | Set the aspect ratio | Aspect Ratio: xx (xx can be 16:9, 4:3, or auto.) |
| Command | Function | Feedback Example |
|---|---|---|
| 50633% | Check the picture mode | Picture Mode: xx (xx can be dynamic, standard, mild, or user.) |
| 50614% | Set the picture mode | Picture Mode: xx (xx can be dynamic, standard, mild, or user.) |
| 50707% | Check the present resolution and polarity | 1920x1080 Hpolarity:1 Vpolarity:0 |
| 50705% | Change the horizontal polarity to the opposite | Hpolarity:0/1 |
| 50706% | Change the vertical polarity to the opposite | Vpolarity:0/1 |
| 50678% | Enable screen output adjusting | Enter Output Position Adjust |
| 50679% | Disable screen output adjusting | Exit Output Position Adjust |
| 50670% | Move the image to left | Output Position Adjust X xx |
| 50671% | Move the image to right | Output Position Adjust X xx |
| 50672% | Move the image up | Output Position Adjust Y xx |
| 50673% | Move the image down | Output Position Adjust Y xx |
| 50674% | Pull left from right side (decrease image width) | Output Width Adjust xx |
| 50675% | Stretch right from right side (increase image width) | Output Width Adjust xx |
| 50676% | Stretch upwards from bottom side (decrease image height) | Output Height Adjust xx |
| 50677% | Stretch downwards from bottom side (increase image height) | Output Height Adjust xx |
EDID Configuration
| Command | Function | Feedback Example |
|---|---|---|
| 50772% | EDID pass-through (default) | EDID: bypass mode |
| 50773% | Set EDID data to 1080P PCM 2.0ch | EDID:1080P&PCM 2ch |
| 50774% | Set EDID data to 1080P Dolby 5.1 | EDID:1080P&5.1ch |
| 50775% | Set EDID data to 1080P3D Dolby 5.1 | EDID:1080P3d&5.1ch |
| 50776% | Set EDID data to 1080i PCM 2.0ch | EDID:1080i&PCM 2ch |
| 50777% | Set EDID data to 4Kx2K PCM 2.0ch | EDID:4K&PCM 2ch |
| 50778% | Check EDID data | EDID: bypass mode EDID:1080P&PCM 2ch EDID:1080P&5.1ch EDID:1080P3d&5.1ch EDID:4K&PCM 2ch |
| 50799% | Program EDID file, send EDID data within 10s | Waiting for edid within 10 secs! |
Note: EDID commands are for HDMI sources only.
Device Configuration
| Command | Function | Feedback Example |
|---|---|---|
| 50698% | Software upgrading | |
| 50699% | Check the software version | Version Vx.x.x |
| 50617% | Restore factory default |
Input & Output
| Item | Specifications |
|---|---|
| Input | (1) HDMI; (1) VGA; (1) AUDIO; (1) 12V POWER |
| Input Connector | (1) 19-pin Type A female HDMI; (1) HD-15 VGA; (1) 3.5mm mini jack; (1) 2-pin Pluggable Terminal Block |
| Output | (1) HDBaseT; (1) 12V POWER |
| Output Connector | (1) RJ45; (1) 2-pin Pluggable Terminal Block |
| Transmission Mode | HDBaseT |
Control Parts
| Item | Specifications |
|---|---|
| Control Ports | (1) FIRMWARE; (1) RS232 |
| Control Connector | (1) Micro USB; (1) 3-pin Pluggable Terminal Block |
General
| Item | Specifications |
|---|---|
| Video Resolution | VGA - up to 1920 x 1080@60Hz; HDMI - up to 4K/UHD@ 60Hz 4:2:0 |
| Audio Impedance | >10Ω |
| Frequency Response | 20Hz~20KHz |
| SNR | >85db@20Hz~20KHz |
| Transmission Distance | 1080p ≤ 70M; 4Kx2K ≤ 40M |
| Bandwidth | 10.2Gbps |
| HDMI Standard Support | HDMI1.4 and HDCP complaint |
| External Power Supply | Input:100V~240V AC; Output: 12VDC 2A |
| Max Consumption | 9.6W |
| Operation Temperature | -10 ~ +40℃ |
| Storage Temperature | -15 ~ +55℃ |
| Relative Humidity | 10% ~ 90% |
| Dimension (W*H*D) | 151mm x 80mm x 44mm |
| Net Weight | 258g |
Panel Drawing
- 151.00 mm
- 80.00 mm
- 48.80 mm
- 108.60 mm
- 41.10 mm
- 70.00 mm
- 60.00 mm
- 4- 4.5 8x90°
- 2-M3 3- 3.5
Troubleshooting & Maintenance
| Problems | Potential Causes | Solutions |
|---|---|---|
| Color losing or no video signal output in HDMI display | The connecting cables may not be connected correctly or it may be broken | Check whether the cables are connected correctly and in working condition. |
| No HDMI signal output in the device while local HDMI input is in normal working state | ||
| Output image with white noise. | ||
| POWER indicator doesn’t work or no respond to any operation | Loose or failed power cord connection | Ensure the power cord connection is good |
Note: If your problem persists after following the above troubleshooting steps, seek further help from authorized dealer or our technical support.
After-Sales Service
If there appear some problems when running the product, please check and deal with the problems referring to this user manual. Any transport costs are borne by the users during the warranty.
- Product Limited Warranty: The product will be free from defects in materials and workmanship for two years (The purchase invoice shall prevail). Proof of purchase in the form of a bill of sale or receipted invoice which is evidence that the unit is within the Warranty period must be presented to obtain warranty service.
- What the warranty does not cover (servicing available for a fee):
- Technical Support: For any questions or problems, contact your distributor or reseller and tell them the respective product name and version, the detailed failure situation as well as the formation of the cases.
- Warranty expiration.
- Factory applied serial number has been altered or removed from the product.
- Damage, deterioration or malfunction caused by:
- Normal wear and tear.
- Use of supplies or parts not meeting our specifications.
- No certificate or invoice as the proof of warranty.
- The product model showed on the warranty card does not match with the model of the product for repairing or had been altered.
- Damage caused by force majeure.
- Servicing not authorized by distributor.
- Any other causes which does not relate to a product defect.
- Delivery, installation or labor charges for installation or setup of the product.
Asking for Assistance
Technical Support:
Phone: +49 5971 800299 - 0
Fax: +49 5971 800299 - 99
Technical Support Hours:
8:30 AM to 5:00 PM Monday thru Thursday
8:30 AM to 4:00 PM Friday
Write to:
PureLink GmbH
Von-Liebig-Straße 10
D - 48432 Rheine
www.purelink.de
info@purelink.de
Legal & Compliance
Product identification
Model: PT-HDBT-701-TXWP – manual version 1.0
Trademarks and disclaimer
Product model and logo are trademarks. All other company and product names mentioned are trademarks of their respective owners. All rights reserved. No part of this publication may be copied or reproduced without prior written permission. We reserve the right to make changes to the device, packaging or manual and accept no liability for misprints.
EU conformity
PureLink hereby declares that this product PureTools PT-HDBT-701-TXWP complies with Directives 1907/2006/EU und 2011/65/EU. PureLink GmbH hereby declares that this product PureTools PT-HDBT-701-TXWP complies with Directives 2014/30/EU and 2014/35/EU.
| Directive / Regulation |
|---|
| 1907/2006/EU |
| 2011/65/EU |
| 2014/30/EU |
| 2014/35/EU |
The full text of the EU Declaration of Conformity is available at: http://www.purelink.de/ce/4251364706794_CE.pdf
FCC
Statement This equipment generates, uses and can radiate radio frequency energy and, if not installed and used in accordance with the instructions, may cause harmful interference to radio communications. It has been tested and found to comply with the limits for a Class B digital device, pursuant to part 15 of the FCC Rules. These limits are designed to provide reasonable protection against harmful interference in a commercial installation.
Disposal of electrical and electronic equipment
WEEE reg. no.: DE 93847290
The crossed-out wheelie bin symbol on the product, packaging or in this manual means that electrical and electronic equipment must not be disposed of with household waste at the end of its life. Hand in old devices free of charge at a public collection point or return them to a distributor obliged to take them back. Remove batteries and lamps that can be removed without destroying the device before handing it in, and delete any personal data stored on the device. Details are regulated by national law. By returning old devices you help protect the environment.
Packaging
Dispose of packaging separately by material (paper/cardboard, plastics) via the local collection systems. Keep packaging material away from children – risk of suffocation. Packaging register LUCID: DE5958616449295.