
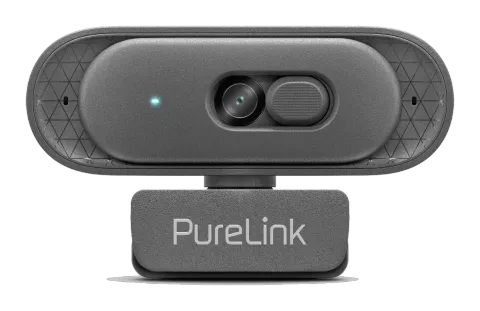
Lens
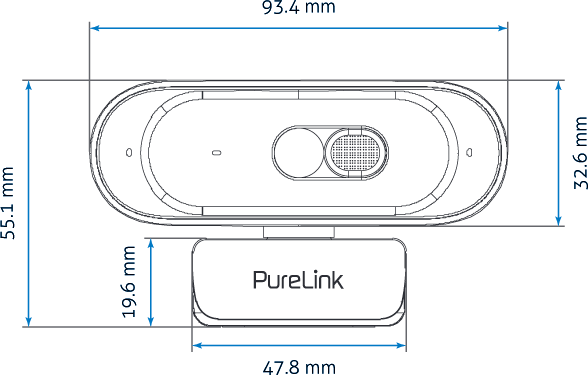
SIZE
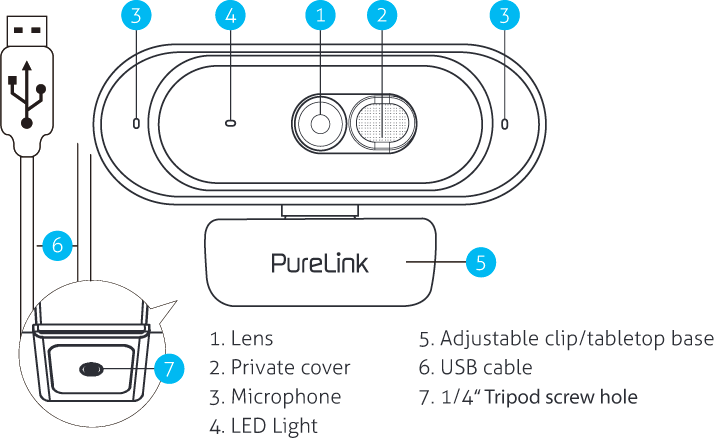
OVERVIEW
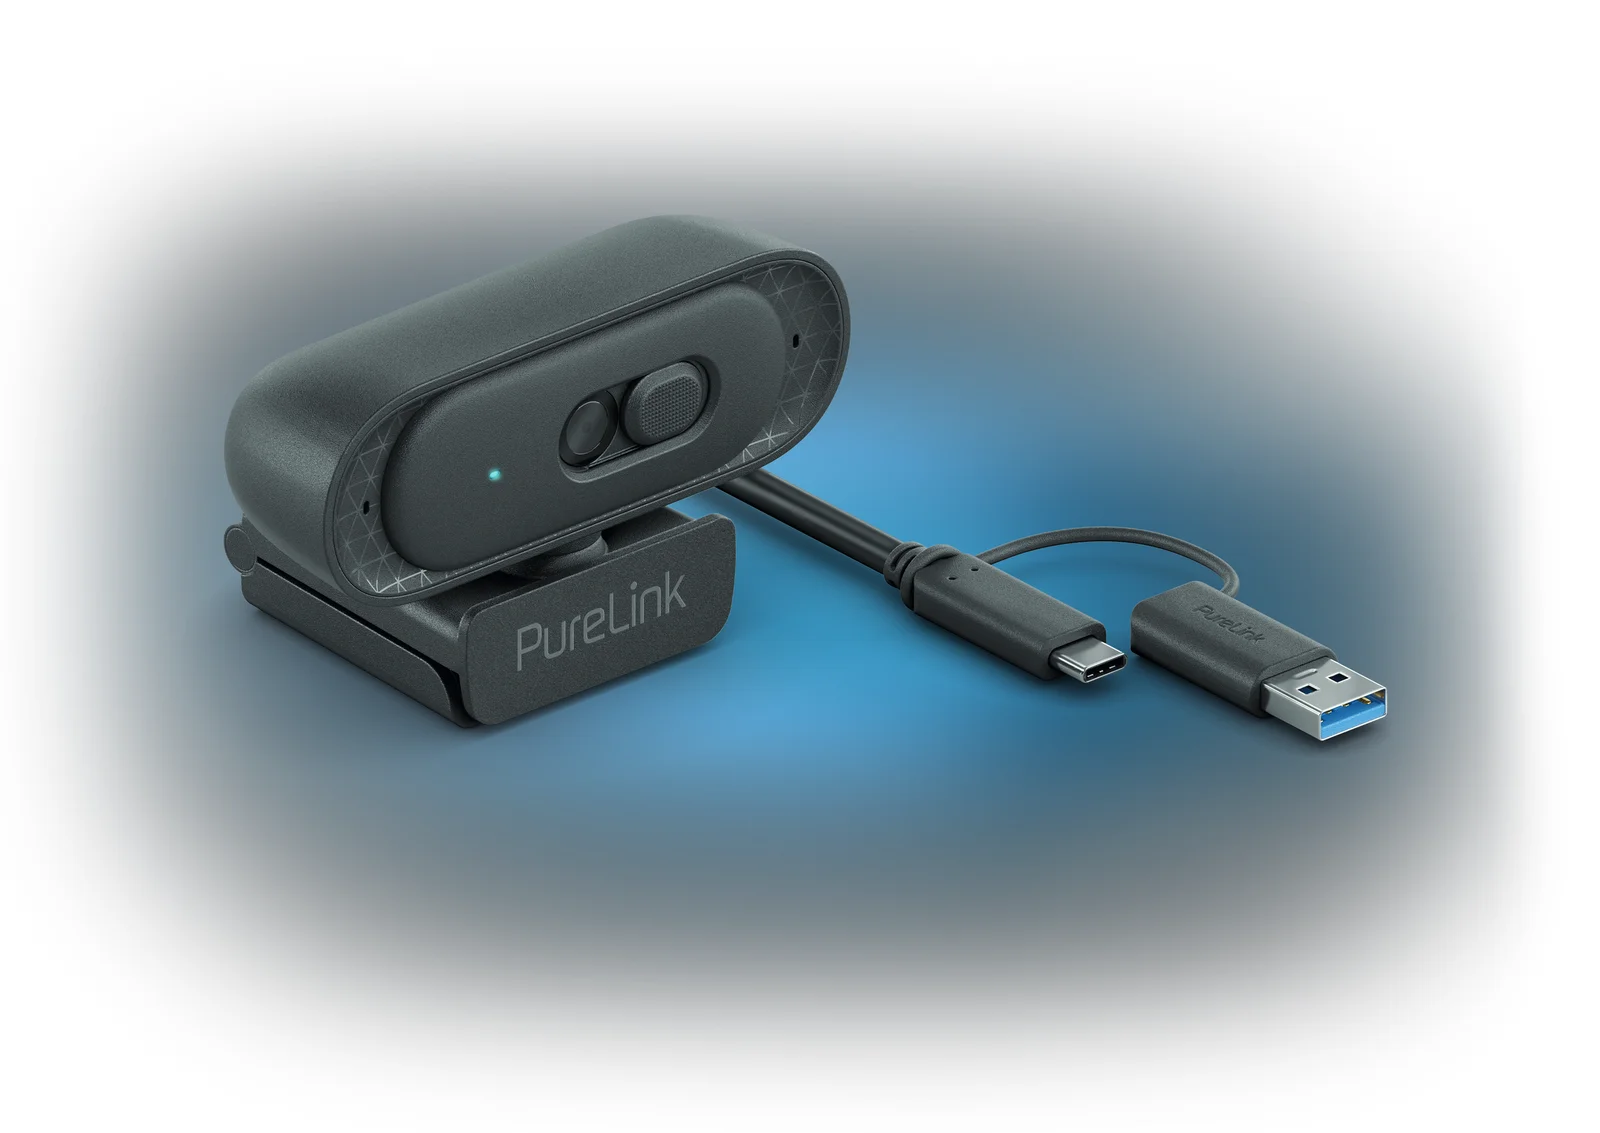
- Lens
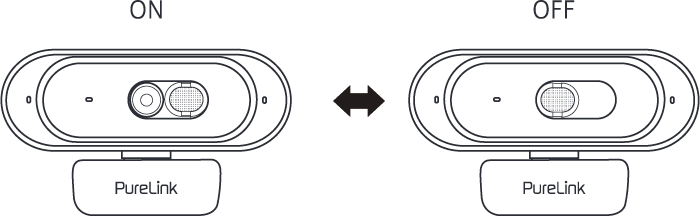
- Privacy cover
- Microphone
- LED Light
- Adjustable clip/tabletop base
- USB cable
- 1/4“ Tripod hole
Privacy cover
SETTING UP
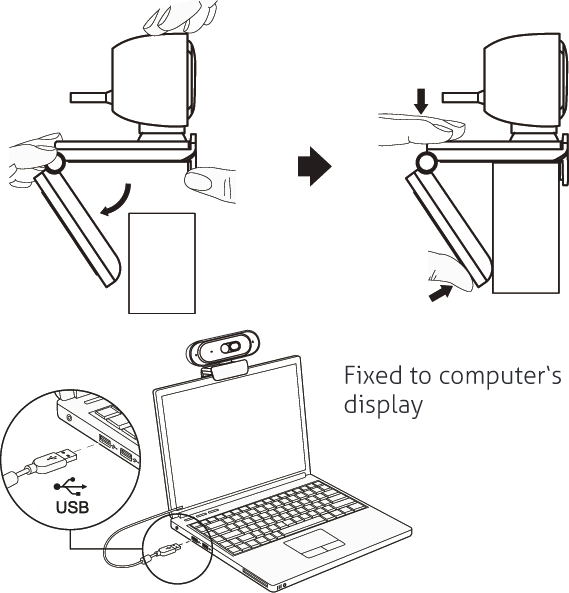
Fixed to computer‘s display
Microphone
SPECIFICATIONS
TECHNICAL
| Resolution | 2K (Support: 2592x1520, 2560x1440, 1920x1080, 640x480) |
|---|---|
| Imaging sensor | 1/ 2.7“, 4.1MP, CMOS digital sensor |
| Focus type | Auto focus |
| Frame rate | 60fps |
| Video format | YUY2/MJPG |
| Viewing angle | D=75°/ H=62°/ V=36° |
| Digital zoom | 4x digital zoom in HD 720P |
| Cable length | 2.00m USB-C cable with USB-A adapter |
| Operation Temperature | 0 - 40°C |
| Microphone | Built-in linear array of double microphones |
BASIC SYSTEM REQUIREMENTS
- 1 GHz Intel® Core™ 2 Duo or above
- 512 MB RAM or more
- 200MB hard drive space
- USB 2.0 port
- OS X 10.7+
- Microsoft Windows®7/ Windows®/ Windows®10/ Windows®11
REQUIREMENTS FOR VIDEO RECORDING
- 3.0 GHz Intel® Core™2 Duo
- 2GB RAM
- QHD 1440P (FHD 1080P/ HD 720P/ GA) screen resolution
LED Light
GETTING STARTED
The VL-OC100 webcam features full plug and play support for Windows®, OS X / MacOS and all other devices. After plugging the camera into the computer’s USB port, you may start any application that accepts a USB video stream, such as Skype, and begin using your camera.
Note: To use the camera‘s internal microphone, you will have to select it as a USB Audio input in your application settings.
VERY IMPORTANT : If the computer does not automatically recognize the camera when it is plugged in, try plugging it into a different USB port. If this does not work, then restart the computer. This will cause the camera to be recognized in most instances.
Adjustable clip/tabletop base
VIEW CAMERA ON WINDOWS
Windows 10 users can use the Camera app, which is already installed with the OS. This will allow you to preview the camera image, capture still frames and video clips. If you need to use the camera with other applications, you will need to enable the camera in the Windows security settings.
- To begin, select the Start button, and then select Camera in the list of apps, or type “camera” in the search bar.
- If you want to use the camera within other apps, select the Start button, select Settings > Privacy > Camera, and then turn on Let apps use my camera.
- From there, turn on each of the listed apps where you want to use the camera.
After you open the Camera app, you may need to switch to the Quad HD Camera, Here’s how to switch from one to another:
- Select Start > Camera > Change camera
When you can see an image from the camera:
- Select Photo or Video and take a picture or make a video
- To see your new photo or video, or ones you‘ve taken before, select Start > Photos and then choose the Collection you want to see
USB cable
VIEW CAMERA ON MAC OS
MacOS users can use the Photo Booth app, which is already installed with the OS. This will allow you to preview the camera images, capture still frames and video clips.
Note: While Photo Booth can be used to quickly preview the camera image, higher-quality videos using the full camera resolution should be created in iMovie or QuickTime, since Photo Booth does not use the full camera image.
As in Windows, you may need to allow apps installed on your computer to access the camera in the MacOS security settings.
- To begin, select the Finder button, click Applications, and start Photo Booth.
If you want to use the camera within other apps, you will need to enable access in the MacOS Security & Privacy settings.
- Go to the Apple menu in the top left corner of the screen and choose System Preferences.
- Go to the “Security & Privacy” preference panel.
- Select the Privacy tab then choose Camera from the left side list.
- Locate the app(s) you want to enable camera access for and check the box
To see an image from the camera in Photo Booth, you may need to select the camera from the list of attached devices in the app.
- At the top of your screen, click Camera in the app menu, and select the Quad HD camera from the list of options
When you can see an image from the camera:
- To capture images from the camera, click the red camera icon.
- To switch to video mode, click the film strip icon in the bottom left corner of the app.
- The red camera icon will change to a video icon at which point you will be able to record video.
CAPTURE HD VIDEO WITH QUICKTIME PLAYER
QuickTime on MacOS offers a method for easily creating video recordings that use the full camera resolution.
- To begin, select the Finder button, click Application and start QuickTime Player.
- After QuickTime launches, click File > New Movie Recording.
- To select the camera input, click the small downward-facing arrow next to the round record button.
- Click the record button to capture video.
CAUTION
- If the webcam becomes hot after running for a long time, we suggest you stop using it for a period.
- Avoid touching the lens with fingers, sharp or coarse materials; use a clean, soft cloth for cleaning.
- Do not use in hot, cold, dusty or humid locations.
- Avoid dropping the camera; impacts may cause damage to the lens, internal malfunction or scratches to the camera surfaces.
CE CONFORMITY
PureLink GmbH hereby declares that this product is in compliance with the essential requirements and other relevant provisions of the EMC Directive 2014/53/EU and the RoHS Directive 2011/65/EU amended by 2015/863/EU.
PureLink GmbH hereby declares that this product is in compliance with the essential requirements of the Electromagnetic Compatibility Regulations 2016 and all other applicable UK regulations.
DISPOSAL OF DEVICE
WEEE-Reg.-Nr. DE 93847290
According to the European WEEE Directive, electrical and electronic equipment may not be disposed of with household waste. As a consumer, you are obliged to return electrical and electronic equipment free of charge at the end of its service life to the public collection points set up for this purpose or to the point of sale. Details on this are regulated by the respective national law. The symbol on the product, the instructions for use or the packaging refers to these regulations. Recycling old appliances in this way is an important contribution to the protection of our environment.
WARRANTY AND LIABILITY
If any fault or damage is detected on your product, please contact your dealer and provide your sales slip or invoice as evidence of the purchase, if necessary. Your dealer will repair the fault either on site or send the device to PureLink. Please describe all faults in detail especially intermittent faults which may not be obvious at first inspection. Only with complete information can we be sure to repair all faults in full!
DISCLAIMER OF LIABILITY
PureLink GmbH will not be held liable, nor provide any warranty for damage resulting from improper installation, assembly and use of the product, or failure to observe the operating instructions and/or safety instructions.
TRADEMARK
Product model and logo are trademarks. All other trademarks mentioned in this manual are acknowledged as the property of the trademark owners. No part of this publication may be copied or reproduced without prior written permission of their respective owners.
Version 08-04-2025
PURELINK GMBH
Von-Liebig-Str. 10
D - 48432 Rheine
Germany
www.purelink.de
WEEE-Reg.-No. DE 93 847 290
PURELINK UK LTD.
Carpenter Court,
1 Maple Road
Bramhall, Stockport
Cheshire SK7 2DH
United Kingdom
GENERAL NOTES
Please read this user manual in its entirety and carefully. It forms part of the product and contains important notes for operating and storing. Please keep this document in a safe place for other users or for personal reference.
This product is intended for indoor use only. Please do not use it in any outdoor areas. Any contact with water and moisture must be avoided under all circumstances.
For product safety and compliance purposes (CE), please do not rebuild and/or modify this product. Please note that if you use the product for purposes other than those described above, the product may be damaged. In addition, improper use can cause hazards such as short circuiting, fire, electric shock, etc.
SAFETY INSTRUCTIONS
Read the Manual
Before using the VL-OC100, read the operating instructions supplied with the product carefully and follow all the safety instructions described below.
Electrical Safety
Ensure that the webcam is connected to a power source that matches the specifications provided in the user manual. Do not expose the webcam to water or moisture to prevent electrical shock or damage.
Mains Cable Usage
Only use the mains cable supplied with the webcam. Do not attempt to modify or replace it.
Installation
Place the webcam on a stable surface to avoid accidental falls. Avoid installing the webcam in locations where it may be exposed to extreme temperatures or direct sunlight.
Usage
Ensure that the webcam is used in a well-lit environment for optimal performance.
Maintenance
Regularly clean the lens with a soft, dry cloth to maintain image quality. Do not attempt to disassemble or repair the webcam yourself. Contact customer support for any issues.
Legal & Compliance
Product identification
Model: VL-OC100 – manual version 1.0
Packaging
Dispose of packaging separately by material (paper/cardboard, plastics) via the local collection systems. Keep packaging material away from children – risk of suffocation. Packaging register LUCID: DE5958616449295.